By Amanda Sabo
Hello again all! In January I posted about making and designing T-shirts using Heat Transfer Vinyl (HTV) and encouraged you to test the waters of T-shirt making without much mess. Today’s post will embolden you to try a new technique: screen printing. Screen printing is a technique where ink is pushed through a fine mesh screen except where the screen has been blocked by a stencil or otherwise made impermeable. Screen printing is great for making multiple T-shirts with the same design, and the finish has a different aesthetic than HTV. This method has a big payoff, though you will need to budget time for clean-up.
Screen Printing Kit
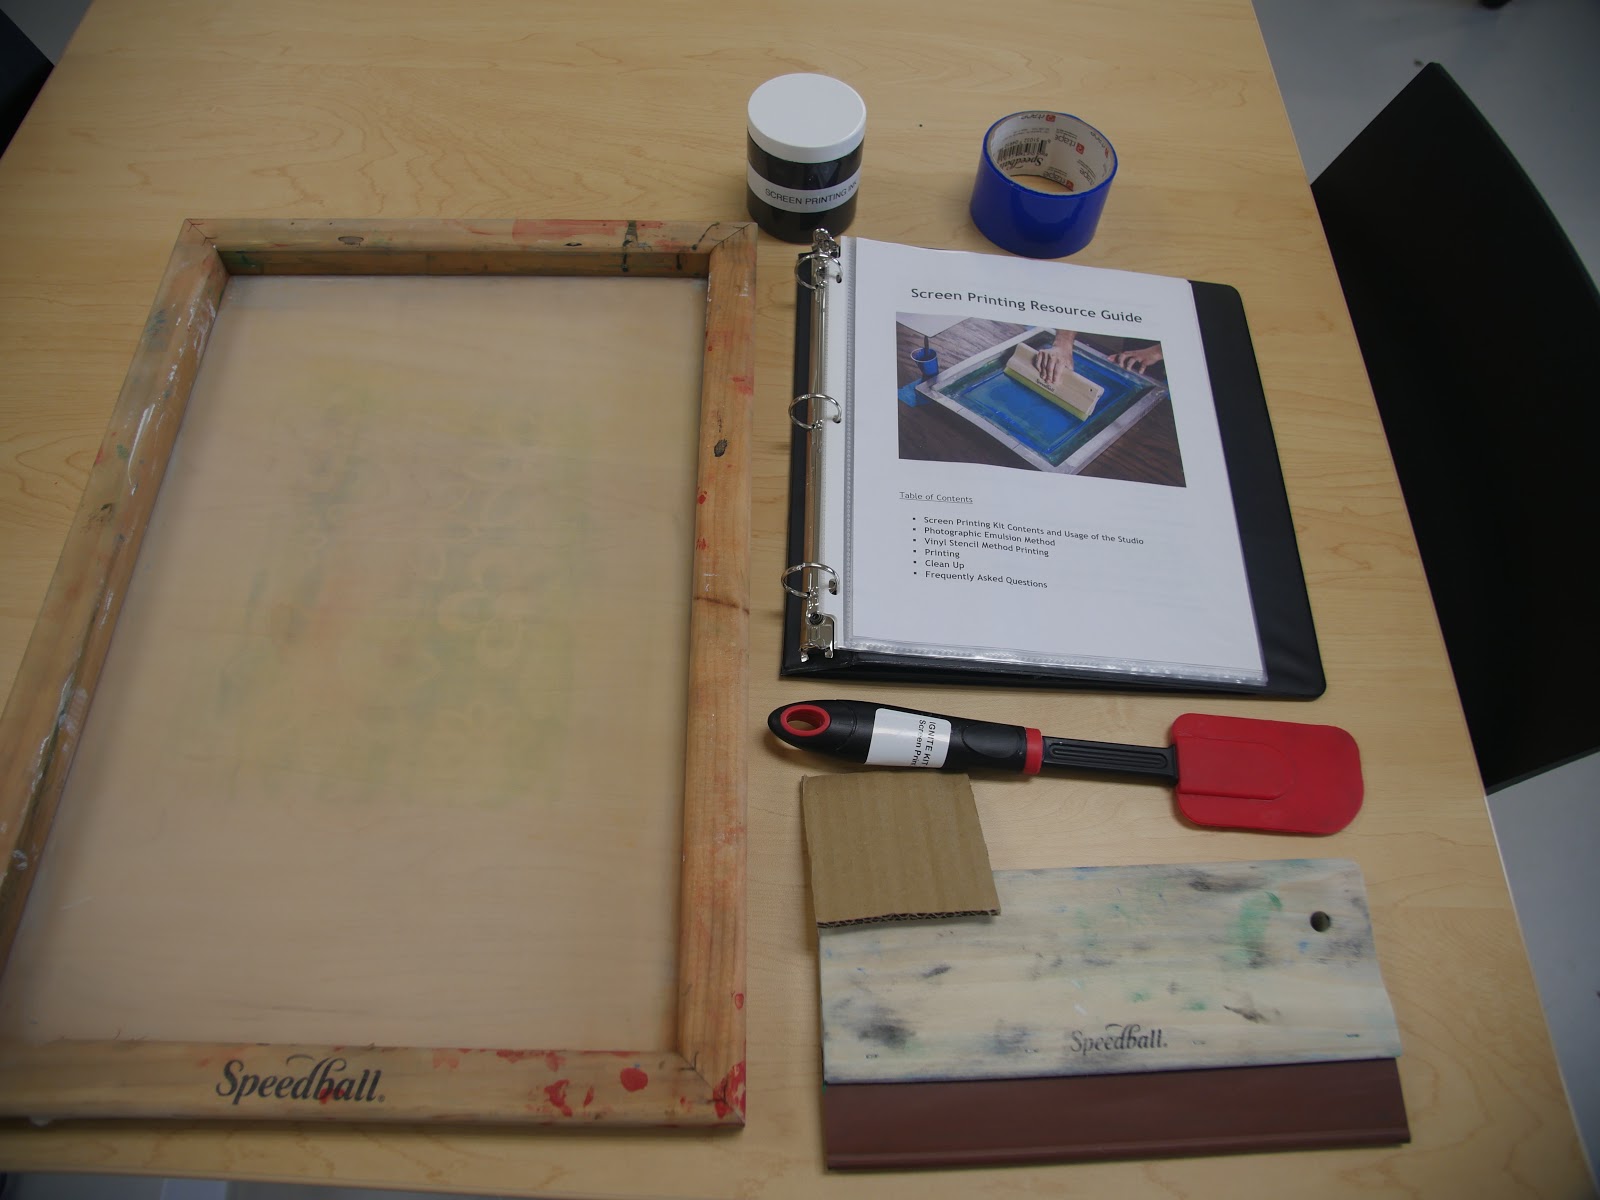
 Ignite offers a screen printing kit to get you started. In the kit you’ll find *almost* everything you need for a successful run. The kit includes the following:
- instructions,
- screen,
- squeegee,
- blue block-out screen tape,
- mat board,
- rubber spatula, and
- small jar of black printing ink.
The provided ink is for your trial run. Bring ink in the color you’d like your design to be and don’t forget to bring T-shirts!
There are two processes for screen printing you might use to make a T-shirt: screen printing with vinyl and screen printing with photo emulsion. Today we are going to talk about screen printing with vinyl. We’ll go over screen printing with photo emulsion another time.
Using Adhesive-Backed Vinyl for Screen Printing
This method is good for first-time screen printers because it has fewer steps and less clean up than photo emulsion. If you’ve already made a shirt using HTV, this method will be somewhat familiar. You’ll cut your design out of adhesive-backed vinyl (rather than HTV) using the Cricut or Vinyl Cutter. You’ll still mirror your design, but once your design is cut, you’ll weed the vinyl from where you’d like the ink to go through the screen. It may feel a little odd to remove what you want to appear on the shirt from your vinyl, but just remember the ink will replace the weeded parts.
From here, I’m going to let Ignite Studio Assistant Sydney finish explaining how to make a print using this method. You’ll want to watch Sydney’s tutorial because seeing the process from start to finish is so helpful to understanding each step.
Clean Up
Once you’ve finished your run, take a plastic spoon and scrape as much ink as you can off of the squeegee and screen. If the ink hasn’t been mixed with another color, feel free to scoop it back into your ink container for later use. Remove the vinyl and tape from the screen and discard. For water-based inks, take your screen to the wash-out basin in the Clean Up Area and use warm water and a foam brush or kitchen scrub brush (found in the dark room) to wash away the ink. If the ink is stubborn, use a small amount of dish soap. Rinse with warm water then set the screen in front of the box fan in the dark room to dry.
After you’ve cleaned out your screen, the final step is to take your T-shirts into the Fab Lab and heat set the ink using the heat press. Now your design is sealed and can be worn and washed! Way to go!
Notes
- Ignite sells adhesive-backed vinyl for $1.25 per foot. It can also be purchased online or at craft stores.
- To learn how to use the Vinyl Cutter, take the certification course.


