

by Kris Hurst
Did you know Ignite’s fab lab equipment can be used not just for creating original works of art, but also doing DIY Home Repair? Ignite’s Laser Engraver is a perfect tool to accomplish some DIY Home Repair of your own with flair!
DIY Home Repair Project: The Porch!
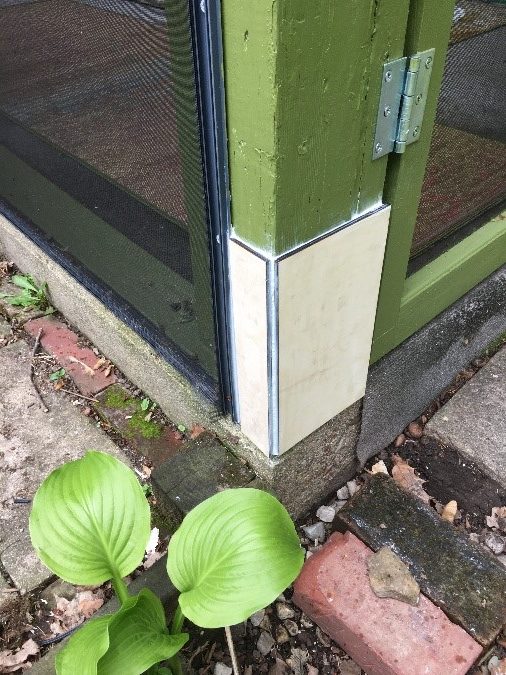
This summer, it’s all about the porch! I have a back porch that I am sprucing up for outdoor entertaining and most importantly: relaxing. I have visions of dining al fresco with friends, lounging with a good book, and taking a mid-afternoon nap with a soft breeze blowing. With the help of my son and friends, I repainted it and screened it in. But, it’s an old porch, so there were a few areas that had some real wear and tear. One of the corners near the bottom needed some real TLC. I knew it would be an undertaking to rip the entire post out. So, instead, I sealed the worn area with a commercial filler.
DIY Home Repair with Ignite’s Laser Engraver
Though now waterproof, this sealed area didn’t look particularly attractive. I started thinking about how to cover it up. I found ‘craft wood’ at a local hardware store, but didn’t really have the proper tools to cut it to size. Then it hit me–I can make custom pieces on the laser engraver! Ignite now has two different thicknesses of plywood, 3mm and 6 mm. 6mm is just what I needed. I measured the post to determine the size of the pieces I would need to cover up the space. Using our Laser Engraver software, RD Works, I converted my inch measurements to millimeters, and used the shape tool to create the rectangular pieces that would cover the front and side.
Decorative DIY Home Repair
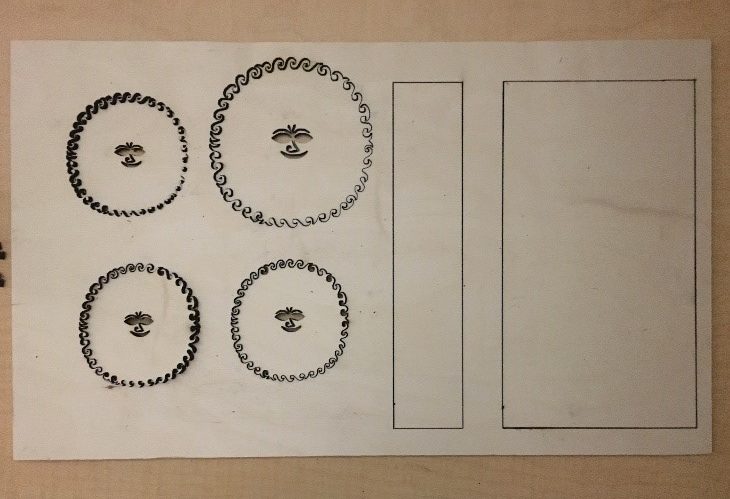
Then I was struck by another brilliant idea! Why not add something artful to these pieces? Though I could engrave the pieces, I thought that adding another layer would make the design stand out. I imported a .jpeg file of an image by Alexander Girard, a famous designer whose love of the sun rivals my own.

Following the instructions on another of our blog posts, Laser Engraver Art: Contour Line Drawing – Ignite Studio at HEPL, I converted the image into a bitmap. This allowed me to cut out the fancy rays and delightful faces.
All of my pieces were ready to go. I put adhesive on the rectangular panels and secured them to the post. I let this cure overnight. The next day, I painted the rectangular pieces to match the porch color.
Channeling Girard, I kept things bright and painted the suns yellow. For the final step, I glued the larger sun to the front panel. (I’m still debating on what to do with the smaller suns????). It felt very satisfying to do this myself and even though it may be an unconventional fix, I am happy with the results.
Perhaps there is something you could upgrade or add a touch whimsy to by cutting your own pieces using the laser engraver. Feel free to share ideas or photos on any of our social media platforms and on our Ignite Community Discussion Board on Facebook. Now, I’m off to enjoy my SUN porch! Happy Making!
