

By Daniel Wiseman
Part of producing quality video content means spending time editing your videos. Video editing is a crucial part of content creation since it allows you to control for various elements like sound, presentation, and extra content that would otherwise be hard to understand in a recording alone! Luckily, Ignite Studio has a few options for video editing software, with Premiere Pro being the most proficient at the job. Read on to learn how to edit videos in Premiere Pro through the Adobe Creative Suite, available in Ignite’s Digital Media Labs.
What is Premiere Pro?
Adobe Premiere Pro is an industry standard video editing application. It’s suitable for all manner of video projects from editing documentaries to short family vacation montages! Being user-friendly, it’s an easy to learn tool. However, it can be time consuming to master depending on your project.
Here’s a short introduction video on Premiere Pro from Adobe that showcases briefly what you can do in Adobe Premiere Pro!
Adobe Premiere Pro and Rush can both be accessed in all DMLs and the AV studio.
Importing Your Footage and Audio
Before you do anything in Premiere, you’ll need to import all your assets you would like to use into the project.

Assets are the individual elements, such as videos, audio recordings, logos and text, pictures, etc. that make up your project. The panel with the text “Import Media to Start” is your project window. This is where you’ll want to import your assets and where your assets will be located. You can import media in one of three ways:
- Drag and drop your files into the panel
- Right click the panel and select Import
- Select File > Import
Once an asset is loaded into the project window, it will display as a thumbnail, which you can drag onto the timeline! You can arrange each file into a folder by also selecting the folder icon at the bottom right of the panel.
Read more about importing and organizing files in the project panel here!
How to Edit Videos in Premiere Pro
Because editing can vary widely depending on the scope of your project, I’m going to list various resources you can use to learn different techniques in Premiere.
For beginners, I encourage you to try out Adobe’s fun tutorial on the music video for Believer by Imagine Dragons. This tutorial teaches how to make simple cuts and transitions, how to mix audio, and color grading. All assets are included in the guide, so its easy to follow along and create your own video!
If you’re doing voice over recordings, you can check out this article here from Motion Array. They cover all you need to know for editing audio tracks and making your voice sound great!
If you’re a little more advanced and want to get up to speed on the latest techniques, check out this video done by Shutterstock Tutorials. This covers nine cuts that every video editor should know.
Rendering and Exporting
After making some progress on your video, it’s a good idea to do a quick render of your footage to improve video playback.
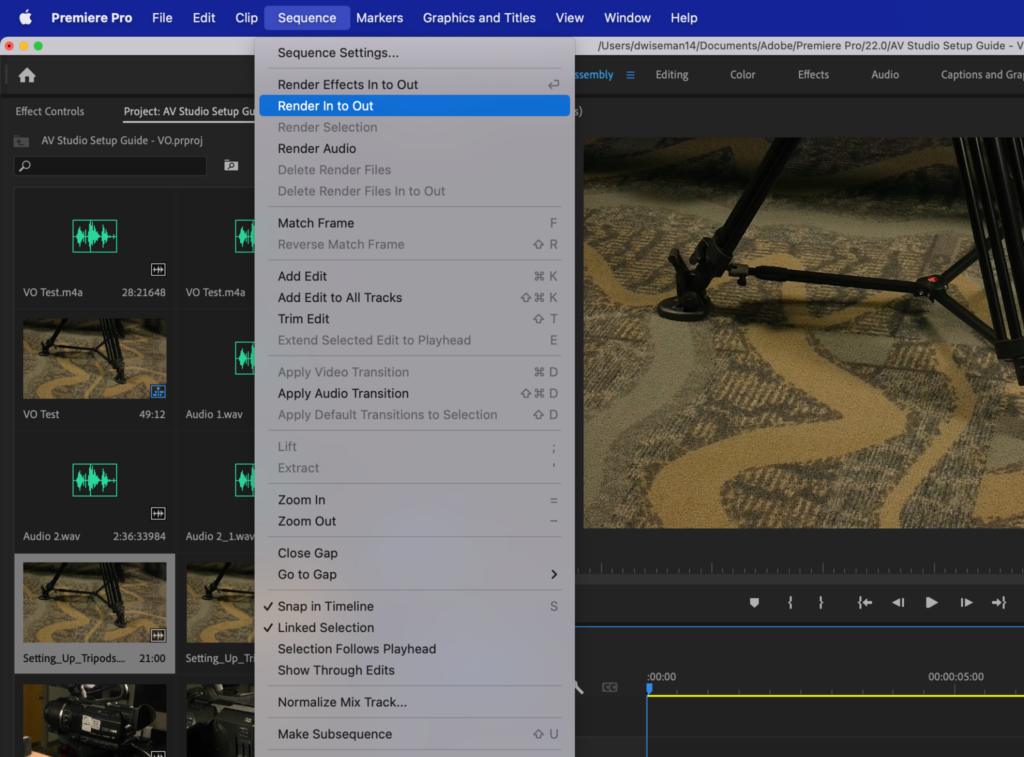
To render your footage on the timeline, navigate to Sequence > Render In to Out.
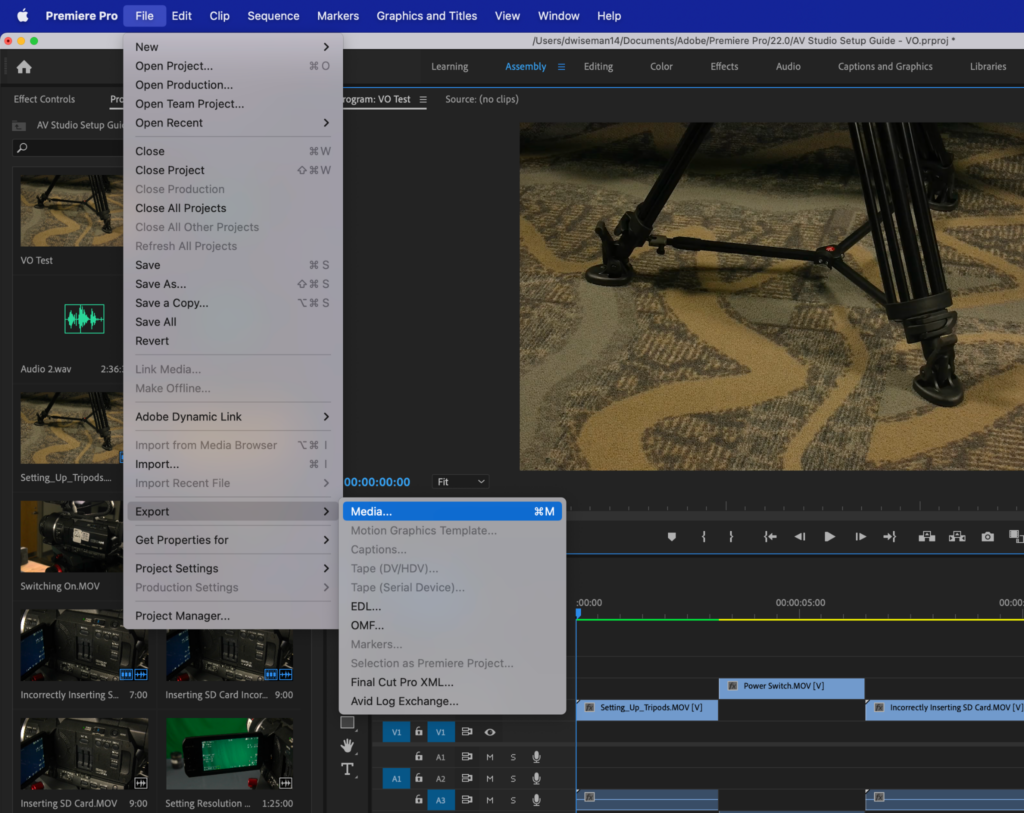
Once you’re finished editing, you can export your project by navigating to File > Export.
From here, the best and most common option for video format is generally H.264. Unless you have a specific reason for choosing other formats.
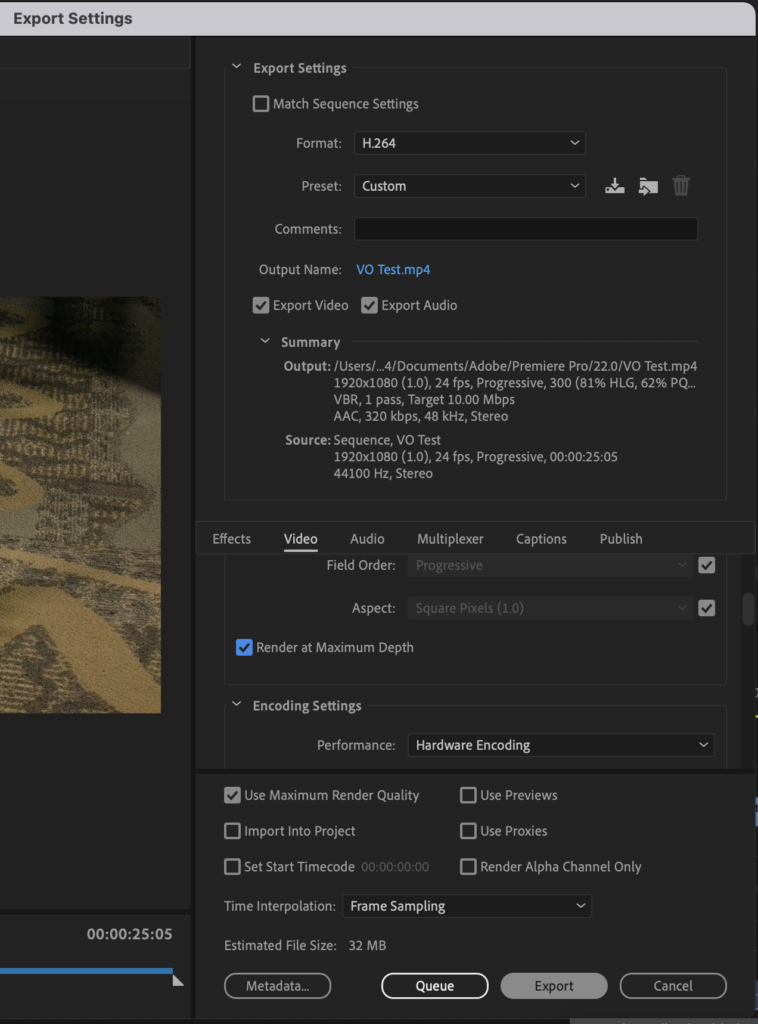
You can change the name of your video file and where it’s saved by selecting the output name highlighted in blue.
For your video settings, make sure that “Render at Maximum Depth” and “Use Maximum Render Quality” are checked off as shown above.
Once all settings look good, select Export. The video will export to your selected file location.
With enough good practice, you’ll begin producing high quality videos in no time! Be sure to check out our Digital Media Labs and practice your editing skills with Adobe Premiere Pro! Happy Making!
