By Sydney Brink
 Have you been itching to try a new media recently? Ignite’s kit library has reopened! You can come in and check out our kits to help jump-start your creativity. I wanted to do something new, too, so I grabbed our oil pastel kit to give it a try. I haven’t used oil pastels since I was in high school—and even then I only received a crash course in them! Today I want to try my hand at it again, and you can follow along with me while we (re)discover oil pastels!
Oil pastels are a pigment, a wax, and an oil mixed together—they’re like big, soft crayons that emulate oil painting. They’re nice to use as an alternative to painting because they are significantly cheaper, require fewer supplies, are more portable, and are more forgiving than other media.
Oil Pastel Techniques
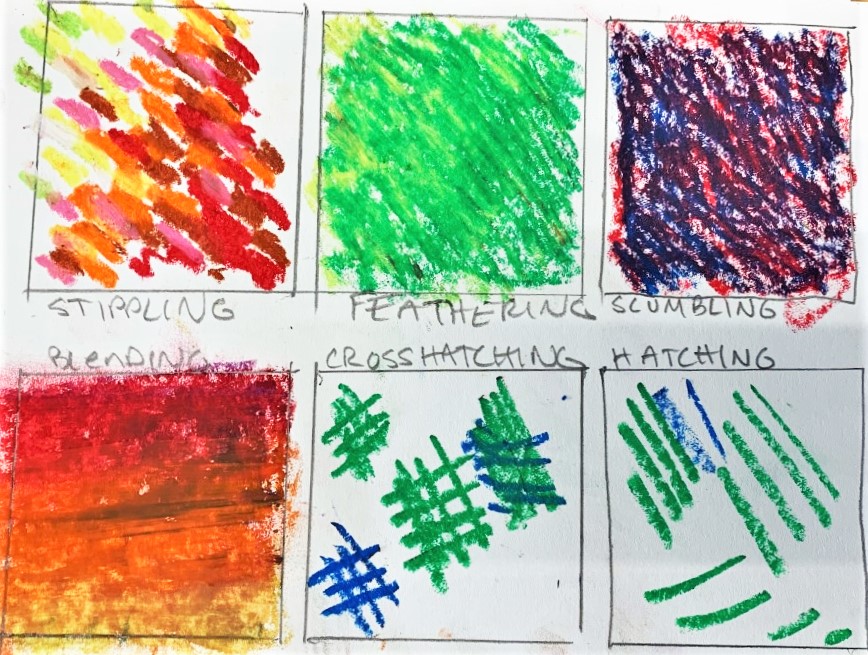
 There are a lot of different techniques that go into a pastel painting—they are outlined in the books provided in our maker kits, but here’s my quick rundown of necessary ones:
- Stippling: Stippling is a technique that basically just means “lots of tiny dots”! In pastels, stippling is frequently used to put lots of colors next to each other, so that when you step back from the painting, the painting fools your eyes into mixing the colored dots together. Think Georges Seurat!
- Feathering: This is lots of quick, light, “feathery” strokes you make with the pastel crayon.
- Scumbling: This technique is laying color down in circles. If you “scumble” two colors together, they layer in a way that mixes the colors together.
- Blending: You can blend two colors that are side by side together using a paper towel, your finger, or a tortillion.
- Hatching: Hatching is just coloring by making parallel lines—using the edge of the pastel to get a thin line, using the top of it to make a large line, or varying pressure on the page with the pastel can all give you different effects.
- Cross-hatching: This is just the term for layering your hatching. If you make one set of lines up and down, the next layer can be side to side to create a darker tone!
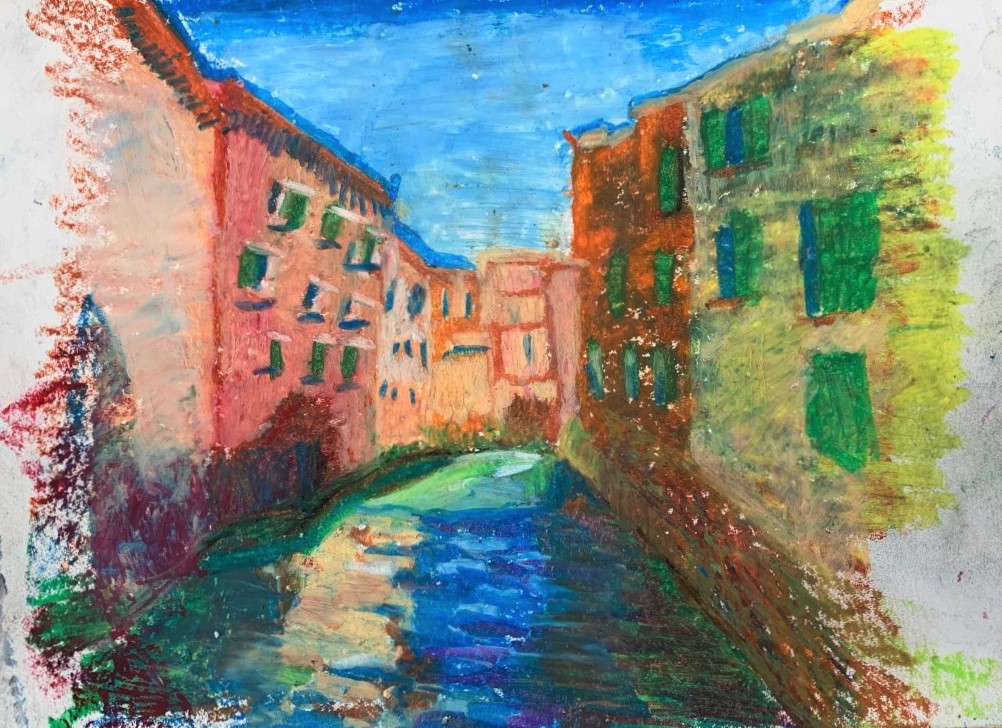
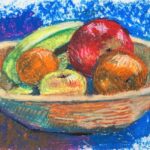
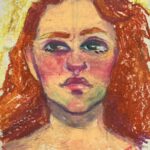
I used all of these techniques and the pastel colors provided in Ignite’s kit library to make a landscape, a portrait, and a still-life drawing. I think they turned out good despite this being my first time using them in a long time! Anyone can come down to Ignite and quickly make masterpieces out of pastels.