

by Jared Hart
Ignite is excited to announce that we have some new materials for sublimation printing! If you are unfamiliar with the sublimation process, we have some videos on HEPL’s Youtube channel to help you learn the basics. This guide will assume you already know the information provided in these two videos. Follow along to learn more about how to sublimate on metal.
Why Sublimate on Metal?
You may be asking yourself, “Why would I want to sublimate on metal?” Well, there are actually several benefits!
Color
The first, and most obvious difference, is the vibrancy of colors. Sublimating onto aluminum that has a white base coat makes colors more vivid after printing.
Image Fade
If you’ve ever had a print that gets consistent exposure to light, you may have noticed that the colors will slowly fade. One advantage to printing on metal is that there is a much longer delay before this occurs.
Scratch Resistant
Although you can still scratch the metal, it is not possible to peel or scratch the image off. This is because the dyes get transferred beneath the aluminum’s exterior coating during the sublimation process.
Cleaning
For the same reason, the print is scratch resistant. You can clean the print without concerns of damaging the print. You’ll just want to make sure to clean it with a soft, non-abrasive, cloth.
Flexibility in Style
If you’d like your print to have a more traditional style, you can frame your piece just as you would a traditional print. Alternatively, you can use some floating wall hooks to display your prints in a modern fashion.
Lightweight
Aluminum is a very lightweight metal, which can give a lot of flexibility and reduce concerns when hanging prints. This is less of a benefit if you are using our small 8”x12” sublimation blanks. However, if you ever have a large-scale metal print, I’m sure this benefit will be much more noticeable.
How to Sublimate on Metal
Once you have your design printed on 8.5”x 14” sublimation paper, it’s probably a good time to begin pre-heating the press. Set the heat press to 400°F for 80 seconds. For instructions on adjusting the heat press settings, you can watch this short 40 second segment from this video: Using the Cricut with a Heat Press.
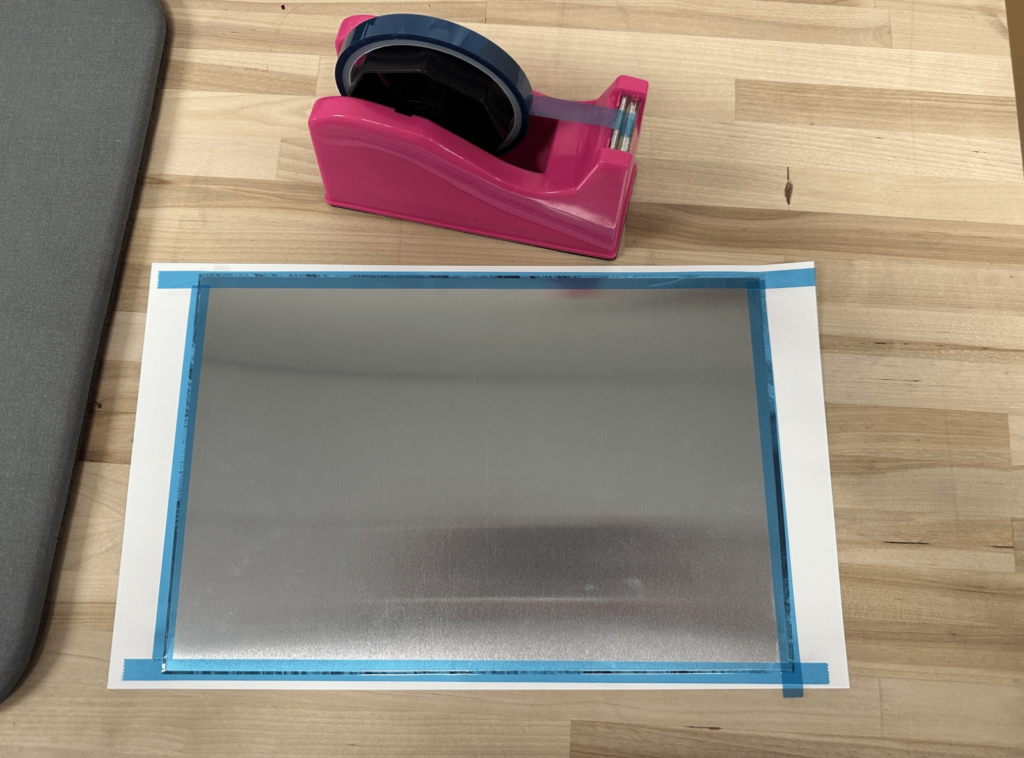
Peel off the plastic coating from the white side of the metal.


Place the white side of the metal face-down on top of your printed image. Use the heat tape on the edges to secure the metal to the paper.
Once the press has pre-heated, turn your project over (paper-side-up). Place two layers of butcher paper on top of your project and place it all in the heat press and clamp it down.

After it has pressed for 80 seconds, using fire-safe gloves, open the clamp and pull your project out to cool. After it has had a few minutes to cool, peel off the tape and reveal your print!


I hope this encourages you to come to Ignite to make some of your own metal prints. Happy making!
