

by Sydney Brink
Check out Ignite Studio’s paper engineering kit, and learn how to make paper sculptures by following these easy steps. Thingiverse is a great resource for finding free 3D models. They are mostly used for 3D printing, but sometimes an object is too large for 3D printing, either because of the size of the printer or the cost. Instead you can use Pepakura–a design software made for flattening 3D modeled objects into printable 2D templates. You can then use scissors (or an exacto knife) and glue to assemble! I love 3D printing, but sometimes I prefer to work with my hands instead of making a project digitally. If you are also into the more tactile side of creating, follow these steps to learn how to make paper sculptures!
How to Make Paper Sculptures
Step 1: Download the Software
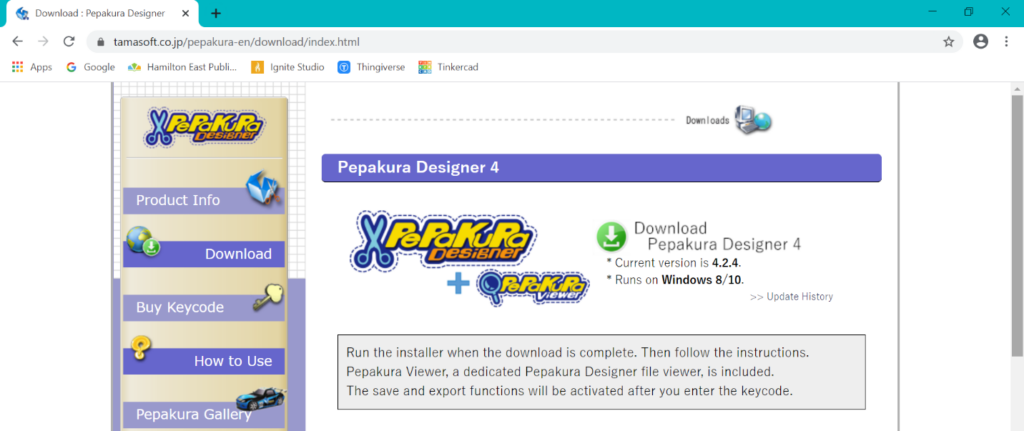
Download the free Pepakura Designer 4 software here.
Step 2: Find Your 3D Object
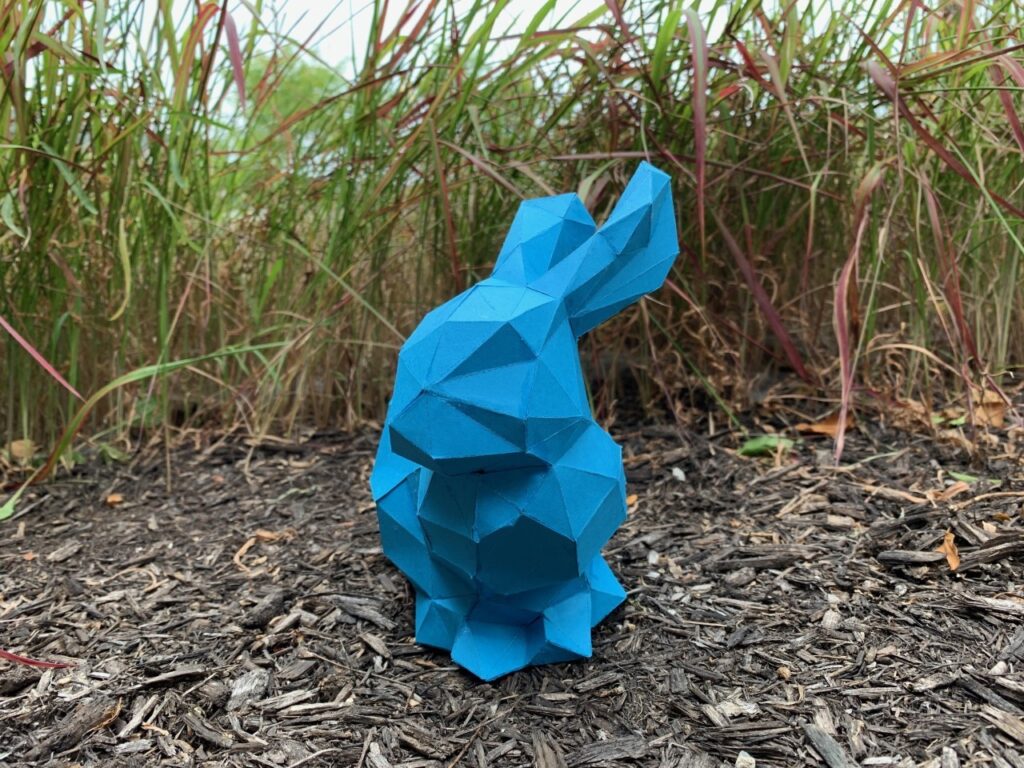
Find and download a file from thingiverse.com. The search term “low poly” will provide lots of fun options that translate well into a 2D template . I chose a “low poly bunny” to download.
Step 3: Import Your 3D object
In Pepakura, go to the menu bar to find “open file” and select the .obj file you downloaded from Thingiverse. There are a few steps the program will prompt you to complete to import your file:
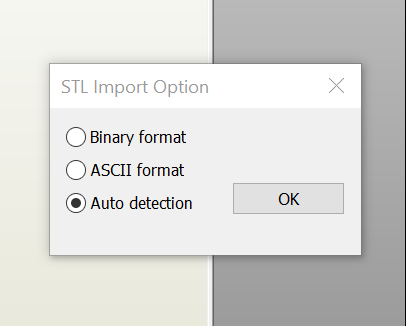
STL Import Option: Auto detection is selected automatically. That’s fine for our purposes, so click “OK.”
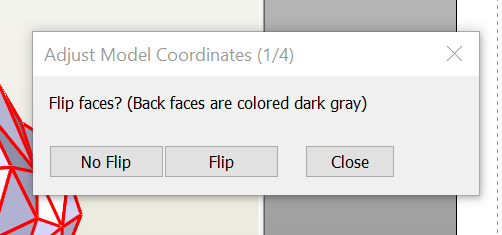
Adjust Model Coordinates: The first window will ask you which way the flat faces of your object are pointing (either facing in our out). The dark gray color on your model represents the inside of the object, so select “flip” to invert the model OR select “no flip” if your 3D model’s faces are already pointed in the right direction.
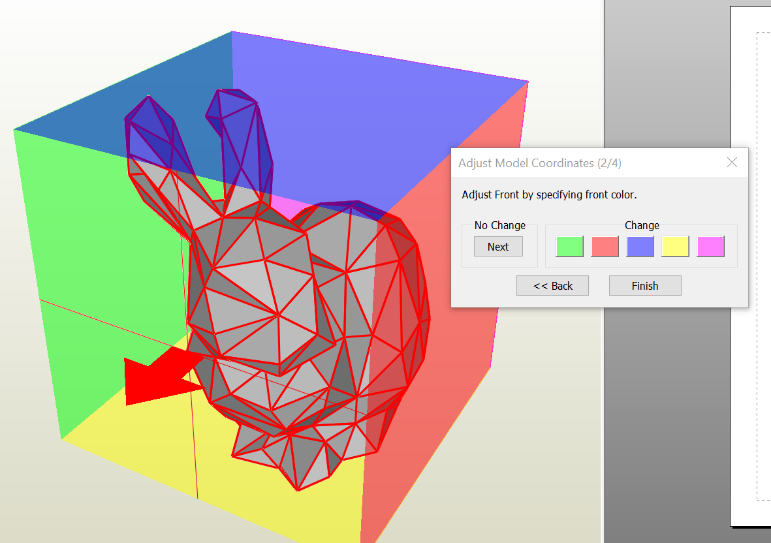
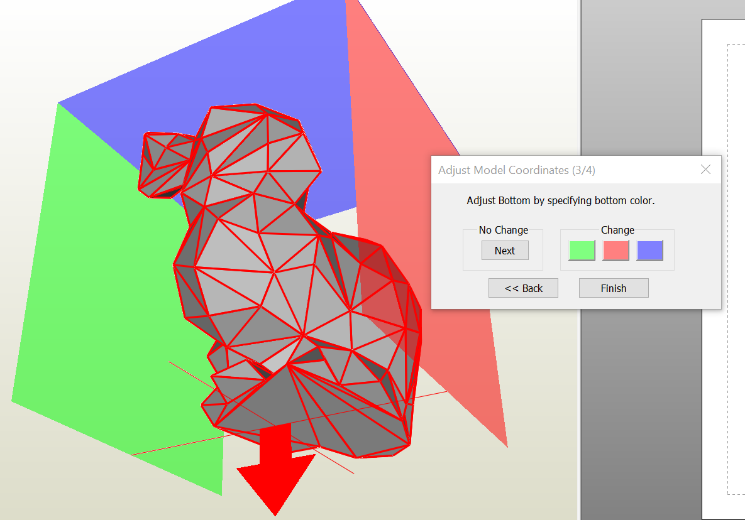
The next window will prompt you to choose the front side of your model. If the front of your model is already on the same side as the red arrow, hit “Next.” If the front of the model is on a different colored side, choose the color side that the front is on.
In the next window you will do the same thing, but with the bottom of your object.
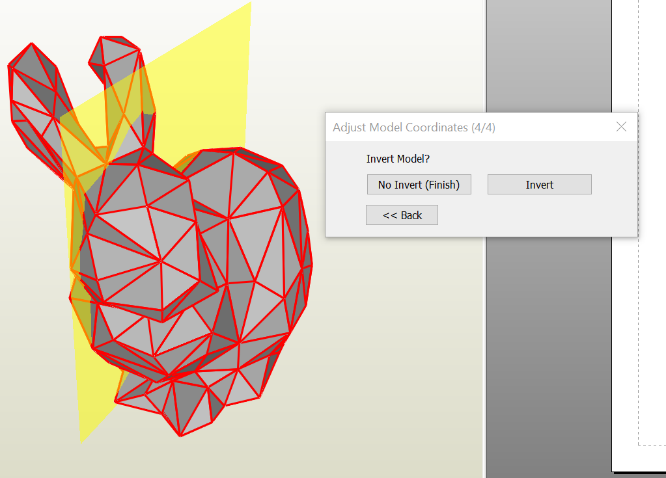
The next window will prompt you to choose which way the program interprets left from right. This does not affect much, and if you have a symmetrical model you can ignore this step by hitting the “No Invert (finish)” option.
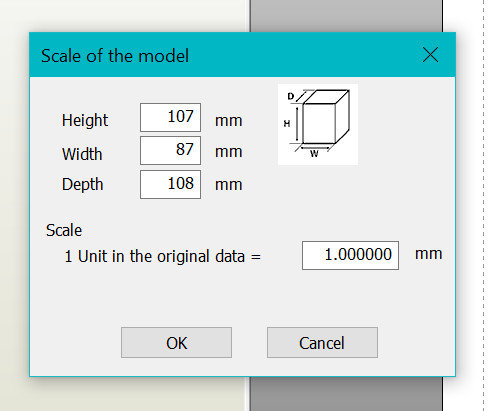
The last step will have you adjust the size of your model. I would suggest at least a six-inch height, as this will give you plenty of room to work with.
Step 4: Move Your Object
To move your object, use the right click on your mouse at the same time as scrolling. This will also help you pan around on the 2D template screen. Scrolling up and down on the mouse will zoom in and out.
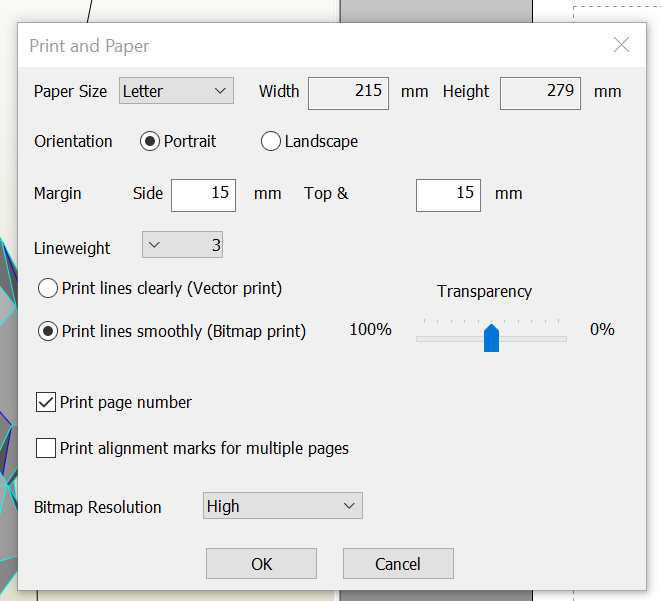
Step 5: Adjust Your Paper Size
Go to: File -> print and paper settings. Where it says “Paper Size,” change it to “letter” for standard sized paper.
Step 6: Decide How You Want The Model to Unfold
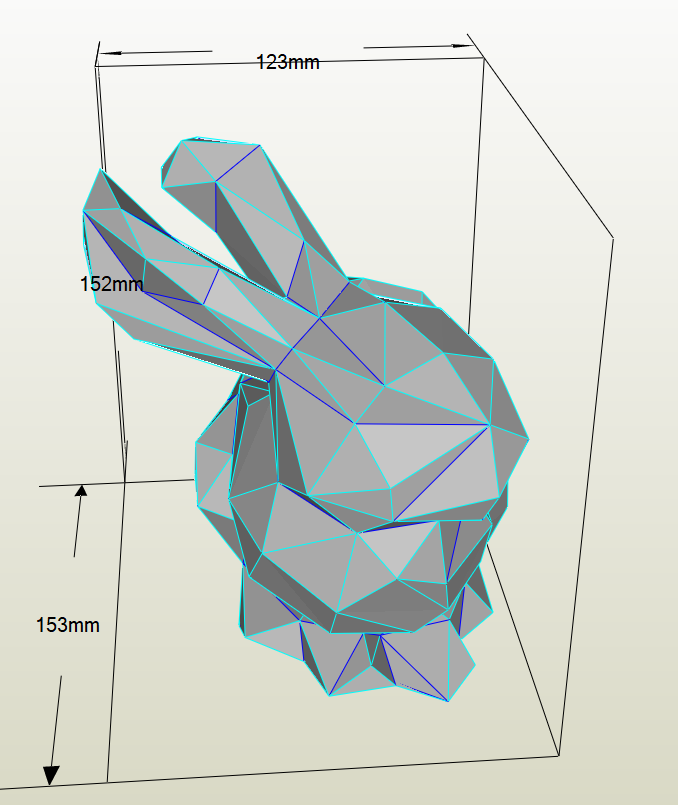
Go to 3D Menu -> Edit mode -> Pick open edge. This tool will create the “edges” to your 2D template. When you hover over a line, it will be green. If you click a line, it will become orange. Orange lines indicate where the model will be split open to create the 2D template. It is a good idea to divide your model up into workable chunks – for the rabbit, I chose to divide it up into the ears, the head, the body and the feet.
This is the bunny model before I “opened” the edges.
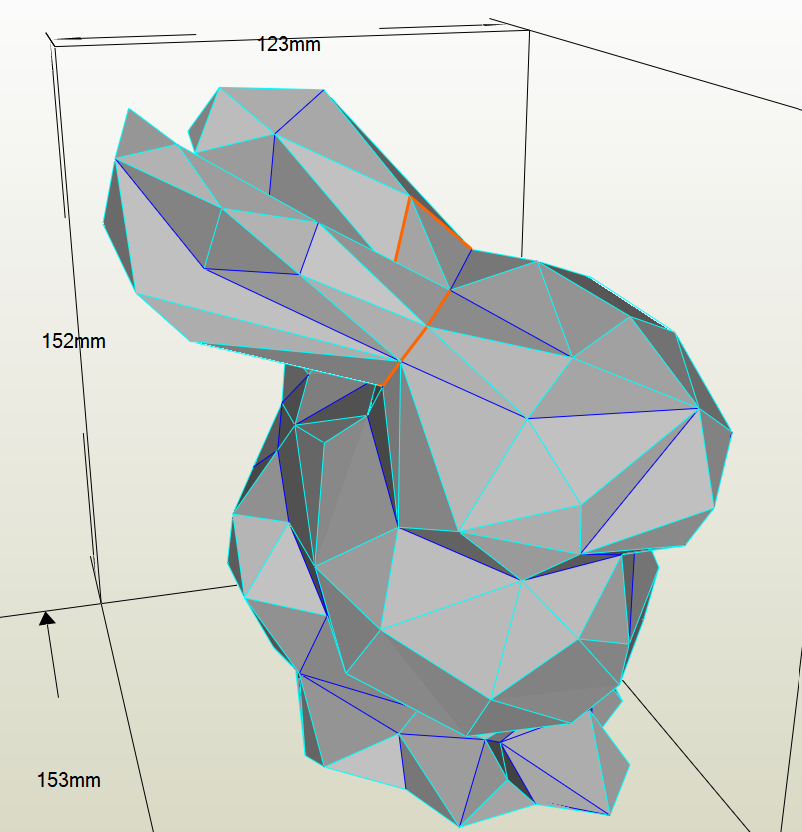
This is the bunny model after I “opened” the edges for the ears; or, after I selected all of the lines around the ears to separate them from the head. You can see the once blue lines have turned orange.
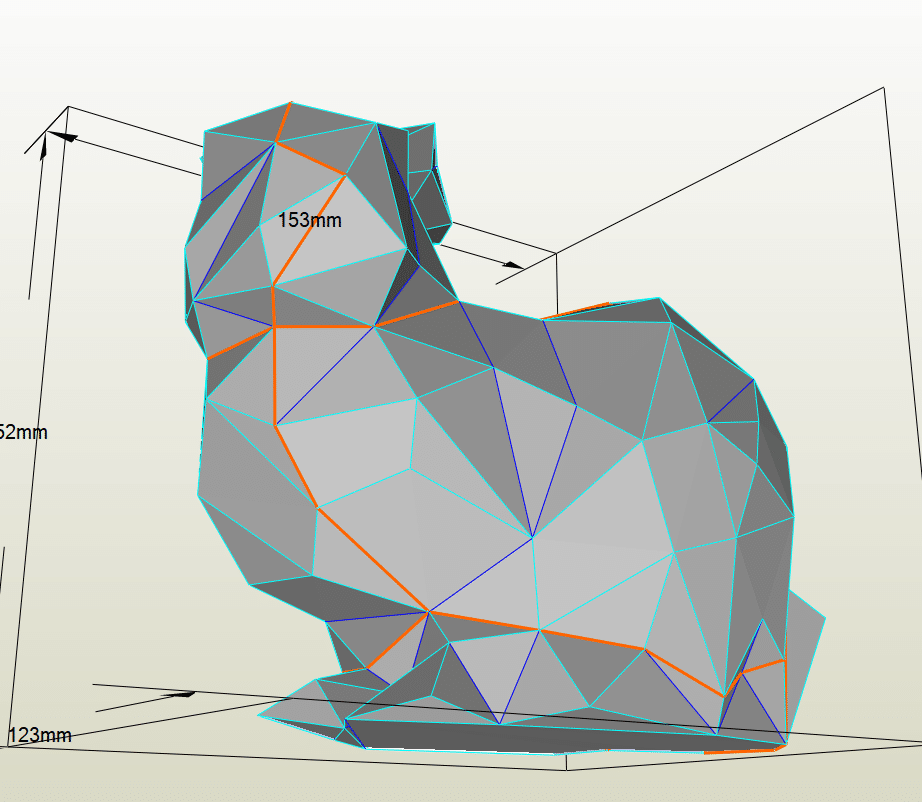
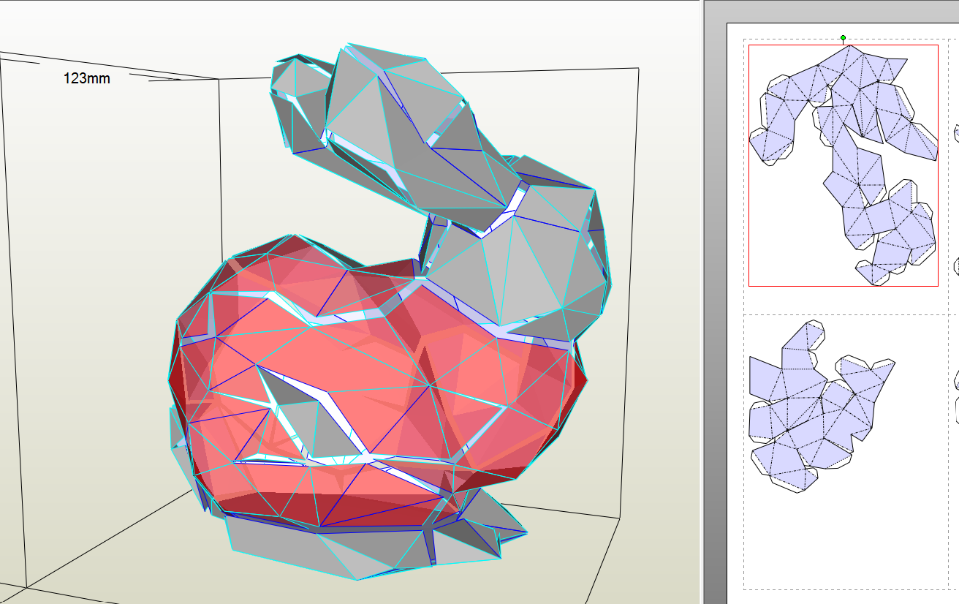
This is another angle of the bunny model after I finished choosing which lines to turn into edges. I separated the head, the body, and the feet; and bisected the bunny to make two separate sides to work with.
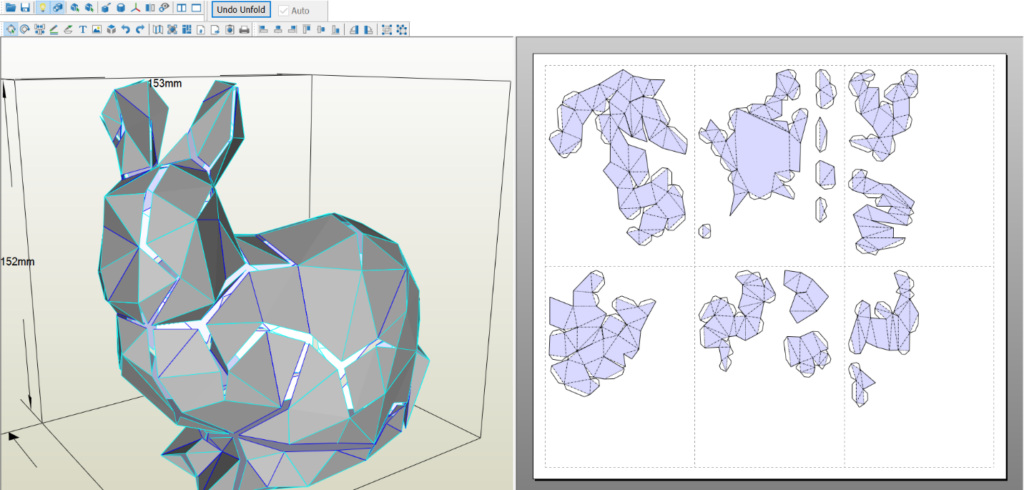
Step 7: Unfold Your Object
Click “unfold” in the toolbar at the top of the screen. Now you have a 2D template! You could print your template from here, or do some editing to make cutting and folding significantly easier.
Step 8: Change the Template to Fit Your Paper
Go to 2D Menu –> edit mode – join/disjoin faces. This will give you the ability to split apart or bring together edges of the 2D template. You can attach the small floating piece to larger ones to minimize the amount of small cuts you’ll have to make. Or you can
disjoin faces in large template pieces to better fit the paper size you are working with. It’s a good idea to look out for overlapping cuts, faces or flaps here and adjust accordingly.
If you click on a piece of the template from the 2D area, the corresponding area on the 3D model will be highlighted in red.
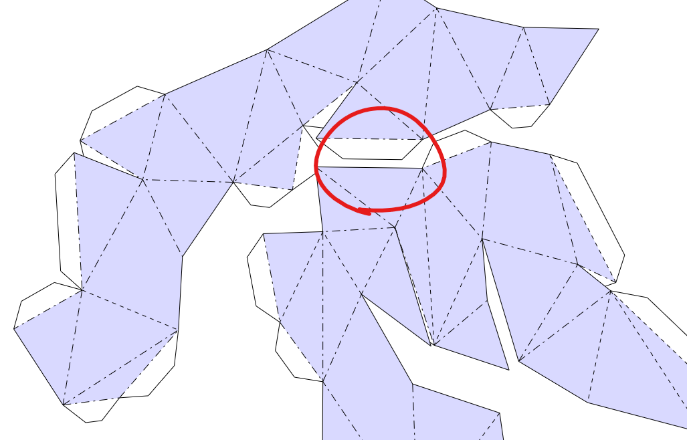
If you double click on a specific face, the corresponding area on the 3D model will light up in a bright red. I think that this piece of the template is too large to easily work with, so the bright red triangle is where I’ve chosen to separate the pieces to make cutting and gluing much easier. You will see a red line when you hover over each piece; simply click it to separate it. The red circle shows the change from one large piece to two smaller pieces.

I also joined many smaller pieces to larger ones to minimize the amount of small cuts and pieces I would have to make.
Step 9: Adjust the Flaps
Now that I have a suitable 2D template, I’m going to look at the flaps (the areas that will be folded and glued to make a seamless 3D object). You can see in the picture above that on this piece, I have many flaps on the same side. This is a disadvantage to cutting and gluing. It is best to have the flaps alternate with edges where possible.
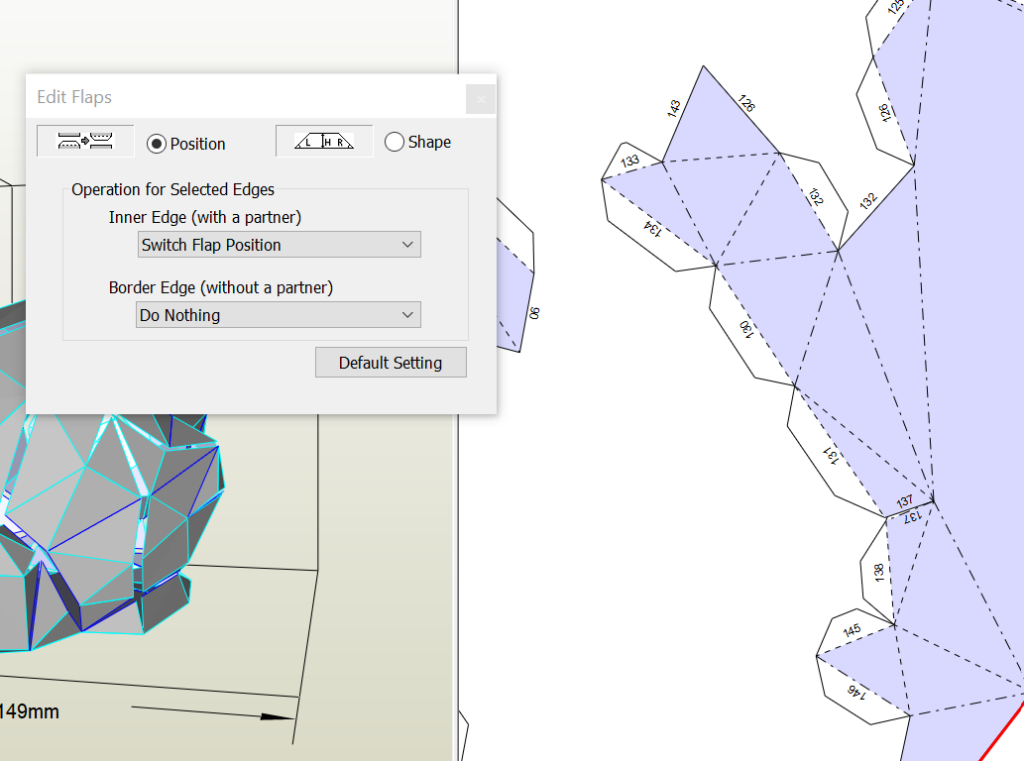
Go to the 2D Menu -> Edit mode -> edit flaps. The first option is position: this is the tool you will use to move your flaps around. When you hover over a flap, the red arrow that appears will show you where the chosen flap will move to. For this template piece, for example, I would move flaps 145, 131, 134, and so on, to get an alternating amount of flaps and edges.
Step 10: Rearrange Your Template
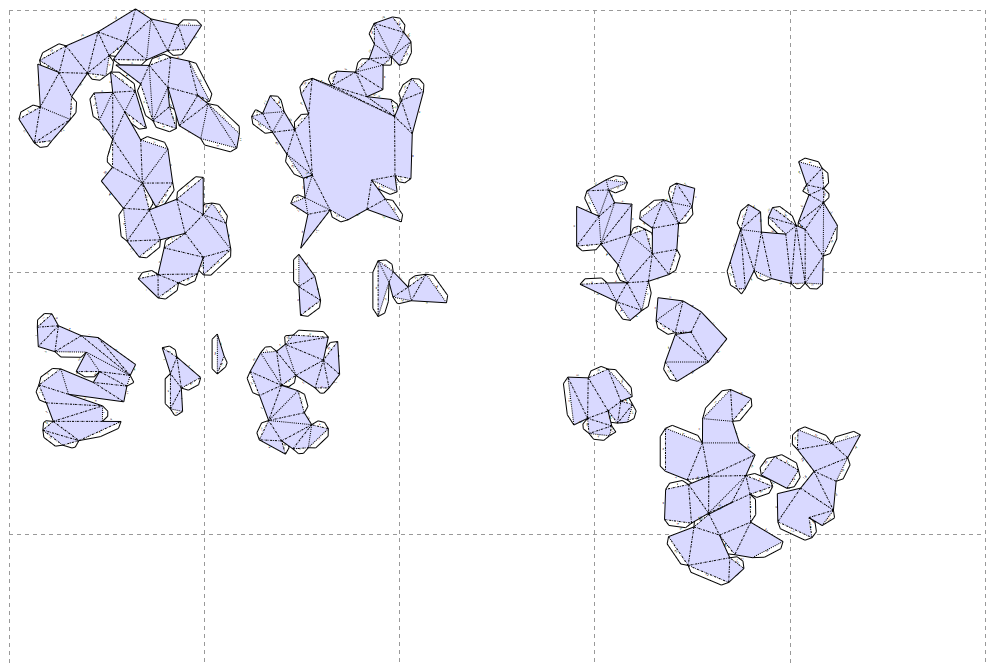
Click on each piece in the 2D template to rearrange them. Each rectangle represents one piece of paper. Use the green circle to rotate a piece, and arrange the pieces to fit on the paper. This step saves you both time and paper.
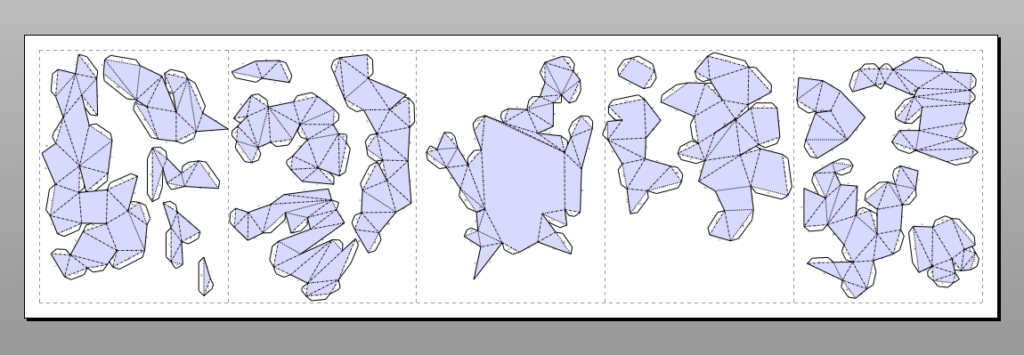
I arranged the template so that the pieces for the left side were grouped together and the pieces for the right side were grouped together. This makes organizing much easier. Above is the finished template!
Step 11: Finish Your Design
Go to 2D Menu -> Show Edge ID. This will generate numbers on your template which you will use to match up flaps and edges.
Go to Other -> Turn texture on/off. This will remove the “texture” or color of the 3D and 2D sides to make a clean template.
Step 12: Print
Go to File -> Print to PDF. Save your pdf, or print your file directly from this menu. If you’ve gotten this far and you are in Ignite Studio, ask a staff member to help you print your file for free!
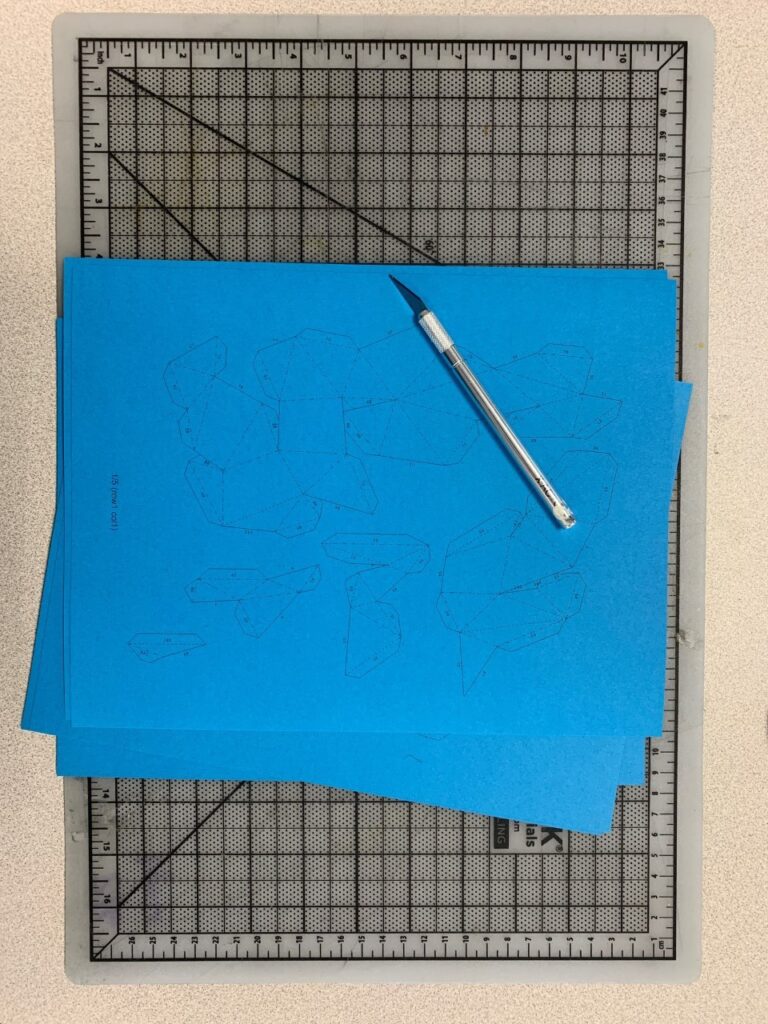
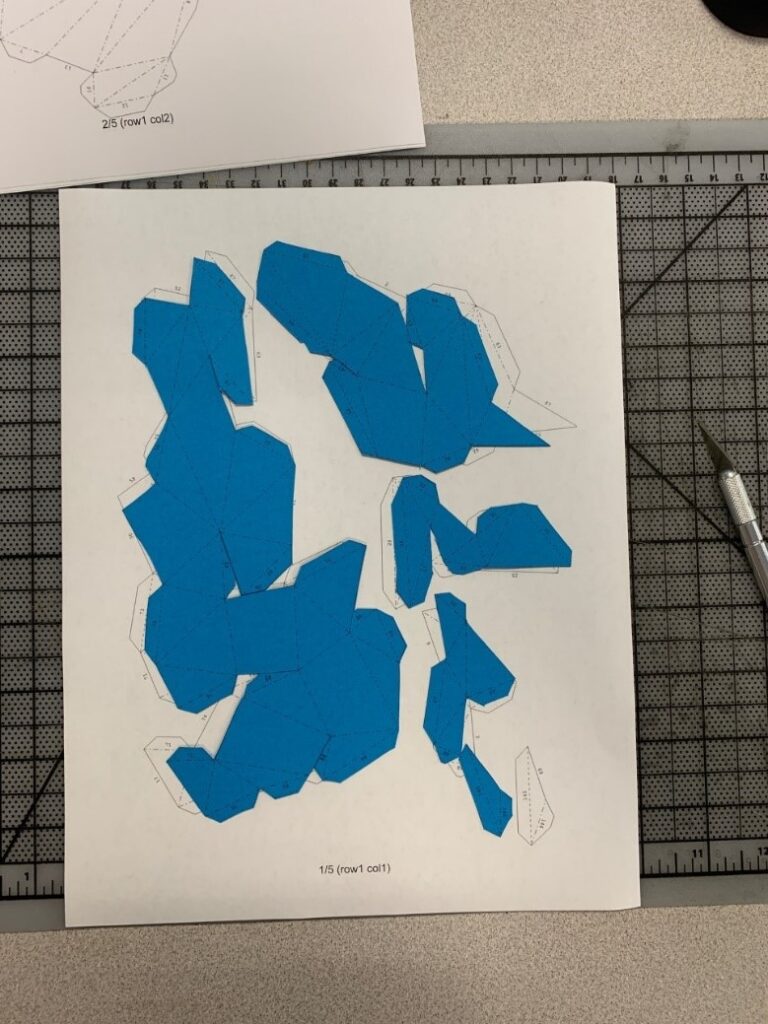
Step 13: Cut Out Your Template
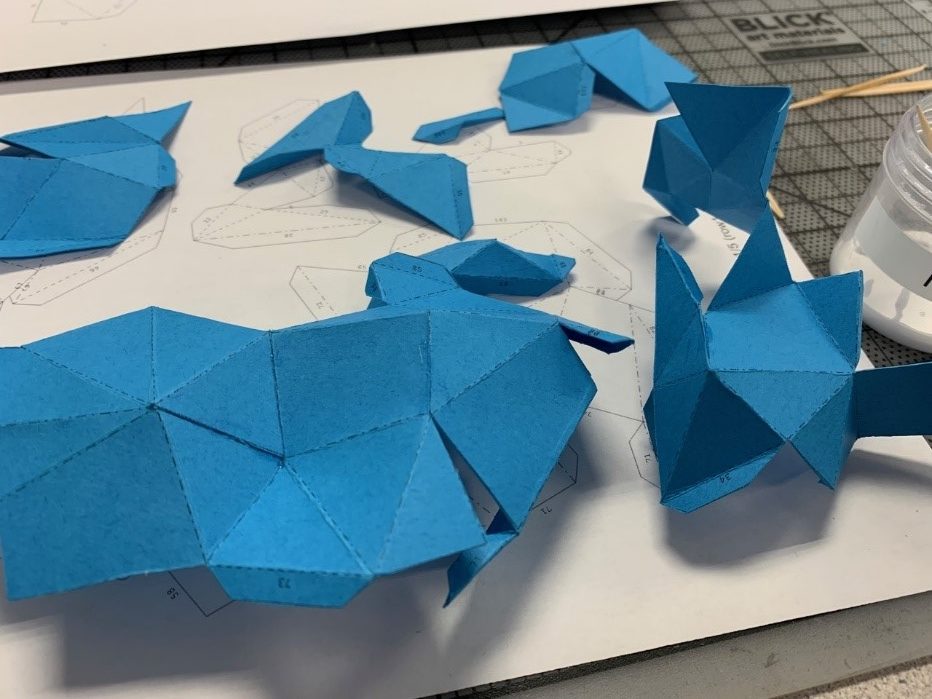
Using a craft knife or scissors, cut along all of the SOLID lines.
Step 14: Fold Your Paper Sculpture
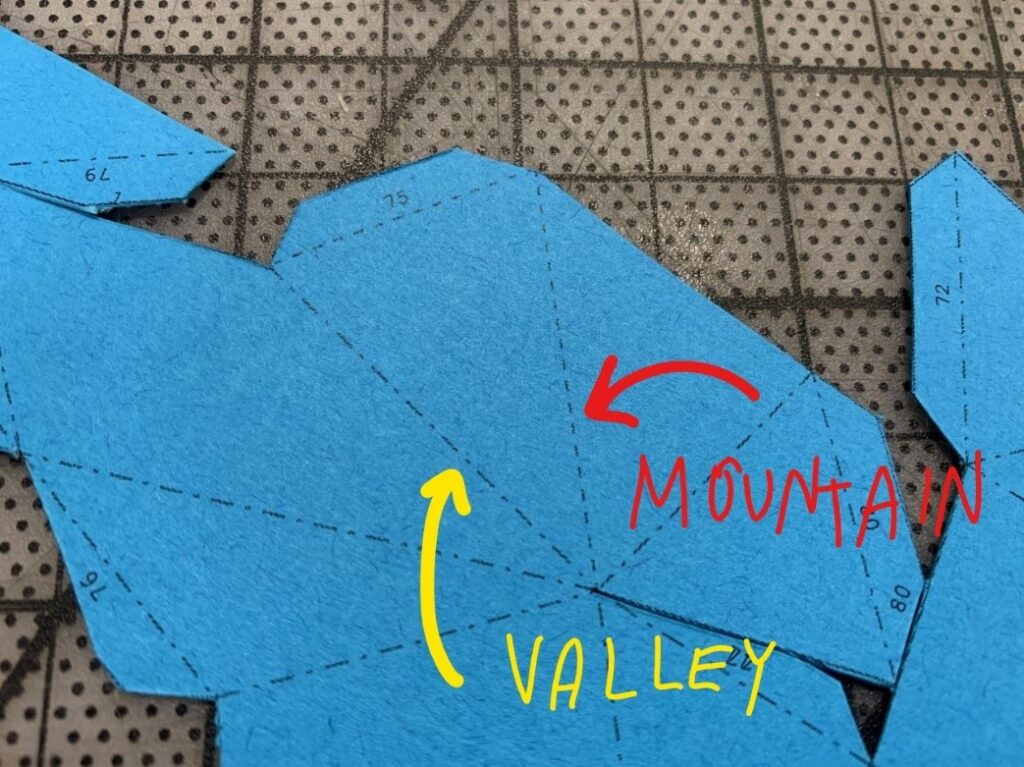
Score and fold along the dashed lines of the template.
– – – – – – – – – – – : “Mountain” fold: Fold into a triangle
— – — – — : “Valley” fold: Fold into a “v”, the opposite direction of the other fold.
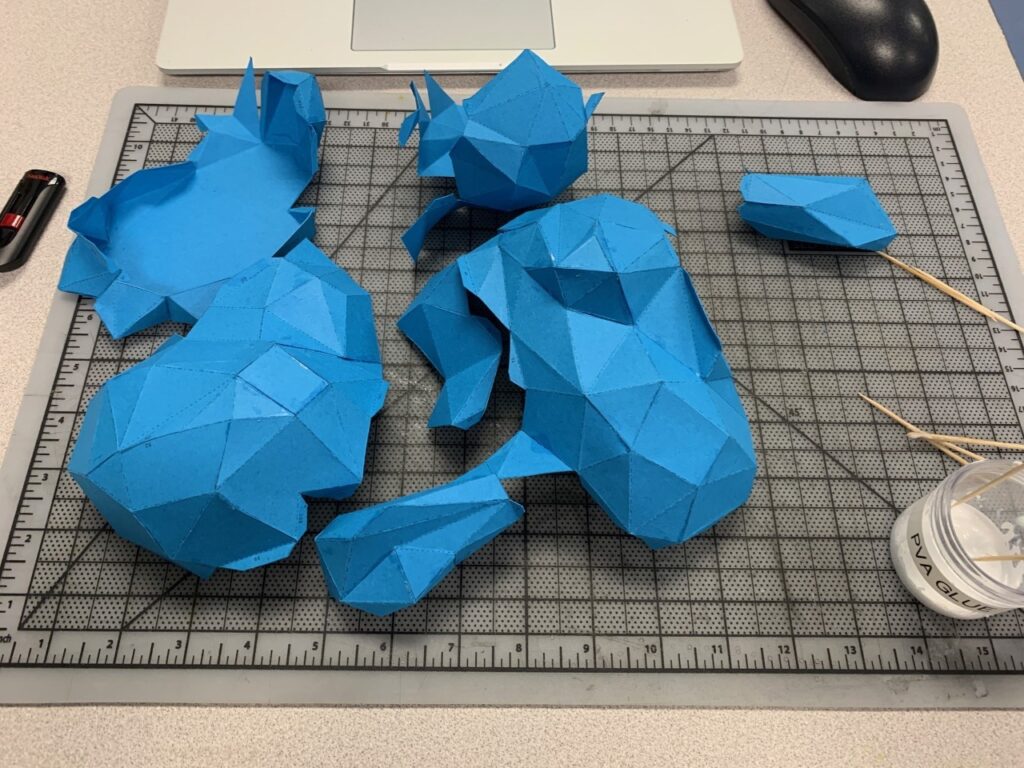
Step 15: Glue Your Paper Sculpture
Using PVA or another paper glue, glue each numbered flap to its corresponding numbered edge. Keep going!
I learned all of this and some more helpful tricks in this video.
If you make your own paper sculpture, share it with us in the Ignite Community Discussion Group. Happy making!
