By Alyssa Dyar
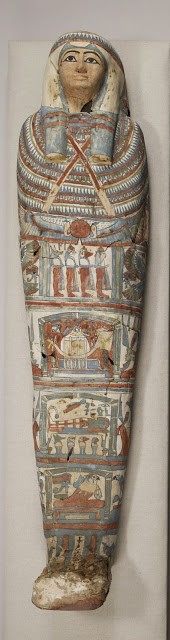
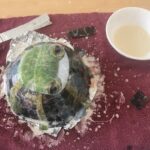
Egyptian coffin made from papyrus, linen, and plaster
During these days of internet interactions and computer conversations, my eyes and hands are craving old-timey paper. Have you noticed it’s everywhere?! In the mail, coffee cups, cereal boxes, egg cartons, birthday cards, notepads, journals! Rather than putting it all in recycling when I’m finished with it, I’m experimenting with ways to reuse it. First, I made paper with egg cartons. Here the journey continues with a DIY papier-mâché bowl.
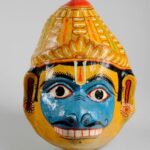
Papier-mâché mask from India
Papier-mâché is a hardened material made from paper pulp and adhesive. There are as many recipes for papier-mâché as there are cultures in the world. In 19th century Britain, for instance, ingredients like mashed potatoes and broccoli were used to make papier-mâché dolls and pots. In China, where the kind of paper we use today was invented, people used many layers of lacquer to toughen papier-mâché helmets used in battle. The ancient Egyptians used layers of papyrus and plaster to make coffins and masks. The possibilities go on and on. The recipe I landed on is a recipe most of us are probably familiar with and consists of flour, water, and torn paper with a few new conveniences added.
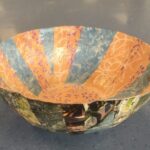
DIY Papier-Mâché Bowl
Materials
- Flour
- Water
- Aluminum foil
- Bowl for shaping the paper maché
- Some kind of oil or cooking spray (I used baby oil)
- Newspaper, magazine, decorative paper
Directions
1. Mix 1 part flour with 2 parts water to make papier-mâché paste. The paste should be the consistency of watery pancake batter.
2. Cover with foil the outside of the bowl you’ll use for molding the paper. Then put oil on the outside of the foil. This will make it easy to remove the papier-mâché from the bowl and the foil.

3. Cut or tear your paper into strips or pieces about 1 inch wide. I also made a circle piece to cover the ends of the strips on the inside of the bowl.

4. Dip the paper pieces one at a time into the flour paste. With your fingers wipe away excess paste from the paper so that it isn’t dripping.

5. Place the paper on the foil-covered bowl. Remember, the first pieces of paper will be the inside of your bowl, so if you’re using decorative, one-sided paper lay the paper face down first so you can see the images on the inside of your finished bowl.
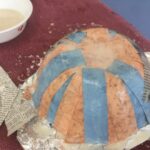
6. Continue layering paper over the bowl. I used newspaper between the inside layer of my bowl and the outside layer of my bowl to make it sturdier. For the outside of my bowl I laid the papers image-side facing up.
7. Let the papier-mâché dry overnight. Once its dry, remove the foil from the bowl used as a mold and the foil from the papier-mâché bowl.
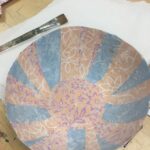
8. To give the bowl a shiny finish, use a glue-and-water mixture to coat it (1 part glue, two parts water). I used Mod Podge (a personal favorite), and it turned out great!