
By Daniel Wiseman
Non-photorealistic Rendering, better known as NPR, is a discipline of 3D graphics and rendering that refers to more stylized and artistic compositions. Some notable examples of NPR would be the Netflix series Arcane or Nintendo’s The Legend of Zelda: Breath of the Wild. Follow this guide to get started with NPR in Blender, available in Ignite Studio, and creating procedural hatching shaders.
Marvel’s What If…? Is also a great example of stylish NPR 3D animation!
When creating NPR based projects in Blender, 3D artists typically begin by creating their own shaders. A shader is a series of code that tells the Graphics Processing Unit (GPU) how the image or the 3D object within the image should be manipulated before it’s drawn to the screen.

In this blog, you’ll learn how to create a cross-hatching shader using the shader node editor in Blender. Before we begin, it’s best you have basic Blender knowledge and 3D Modeling skills to best follow along, such as:
- Creating, deleting, and modifying objects.
- 3D rendering and lighting.
- Using cameras.
- Basic Blender navigation and shortcuts.
I’ll be using Blender 2.93 and will be rendering in Eevee.
Step 1. Creating our Texture Nodes
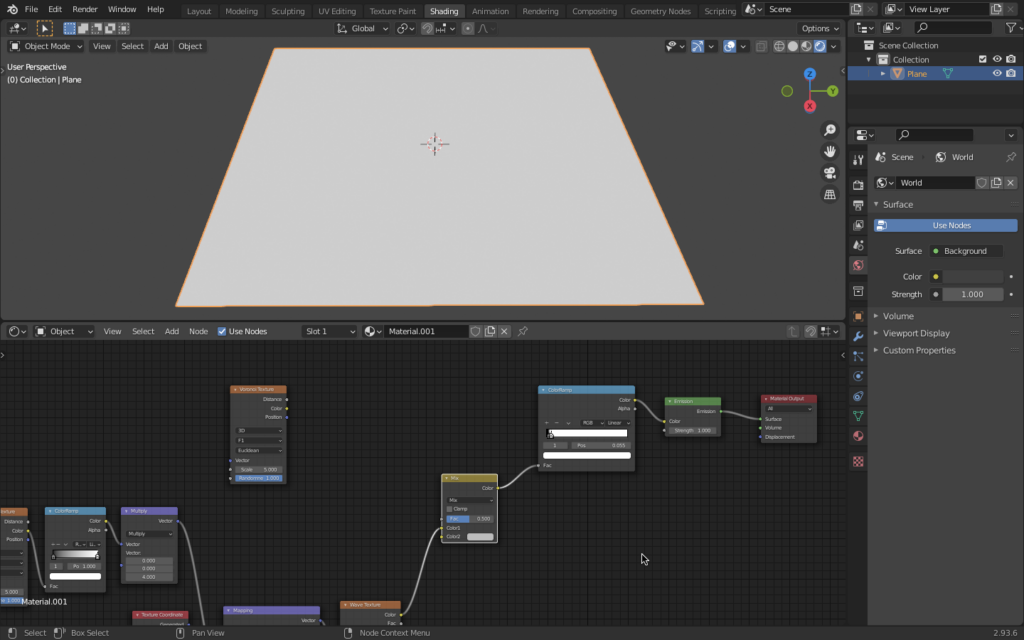
Delete all objects and create a new plane, this will be the object we assign our shader to.
Over on the shading tab, create a new material and delete the Principled BSDF shader, replacing it with an emission shader (you can create nodes by hitting Shift + A and using the search function to search for any node you’ll need in the editor).
Hold Z, and switch to rendered view.
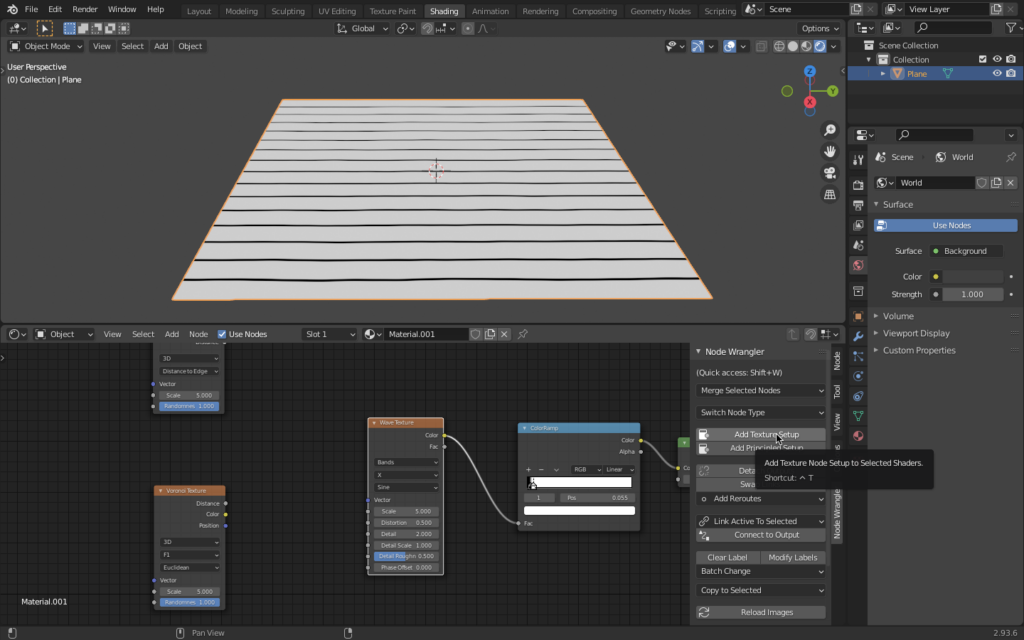
Create the wave texture and color ramp nodes and connect them like so.
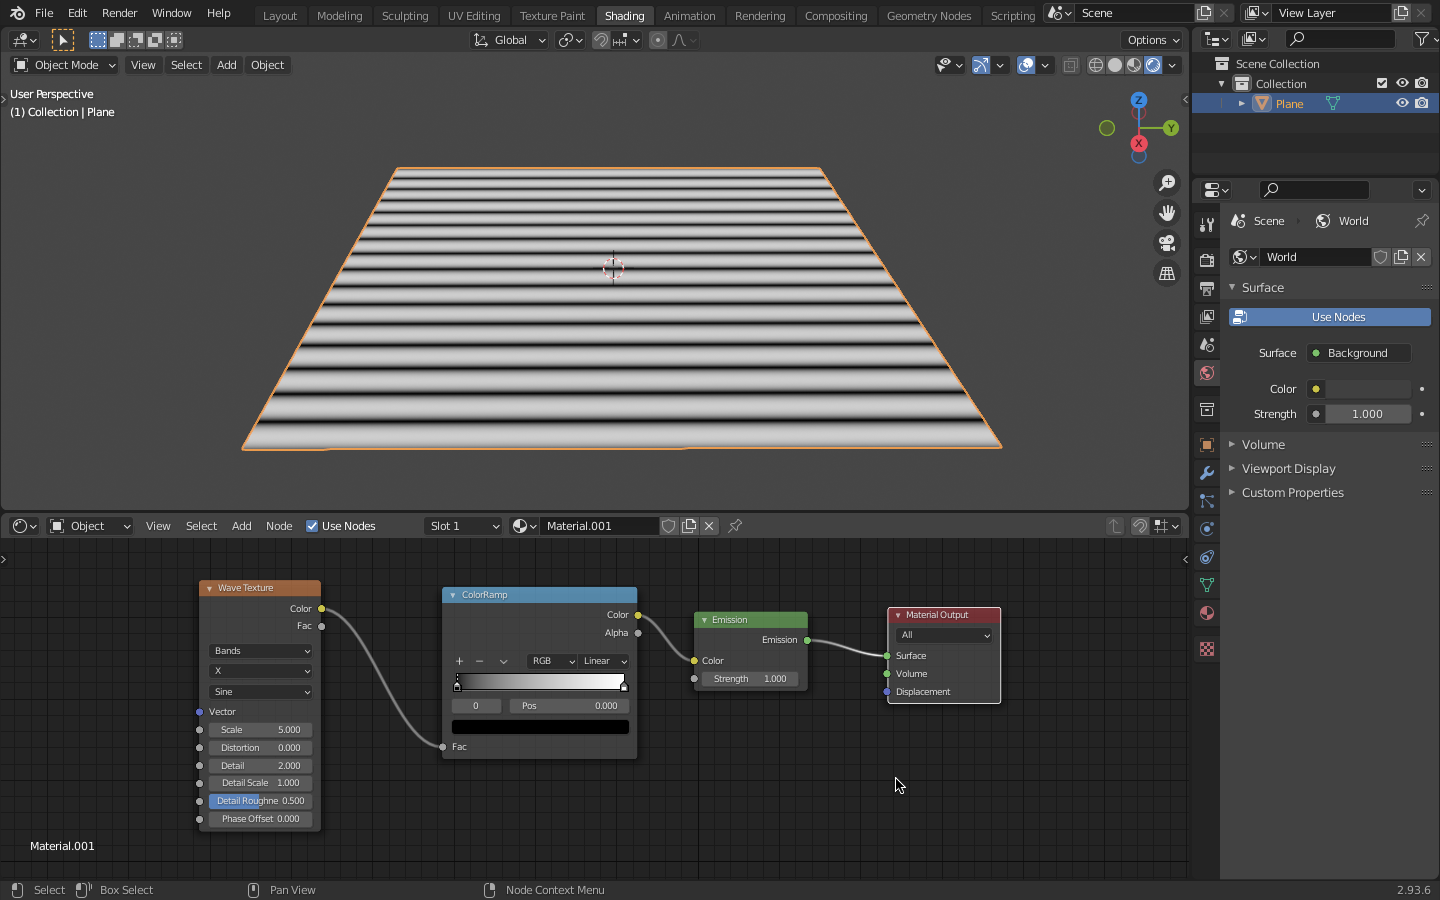
On our color ramp, we want to bring the white and black values close to each other.
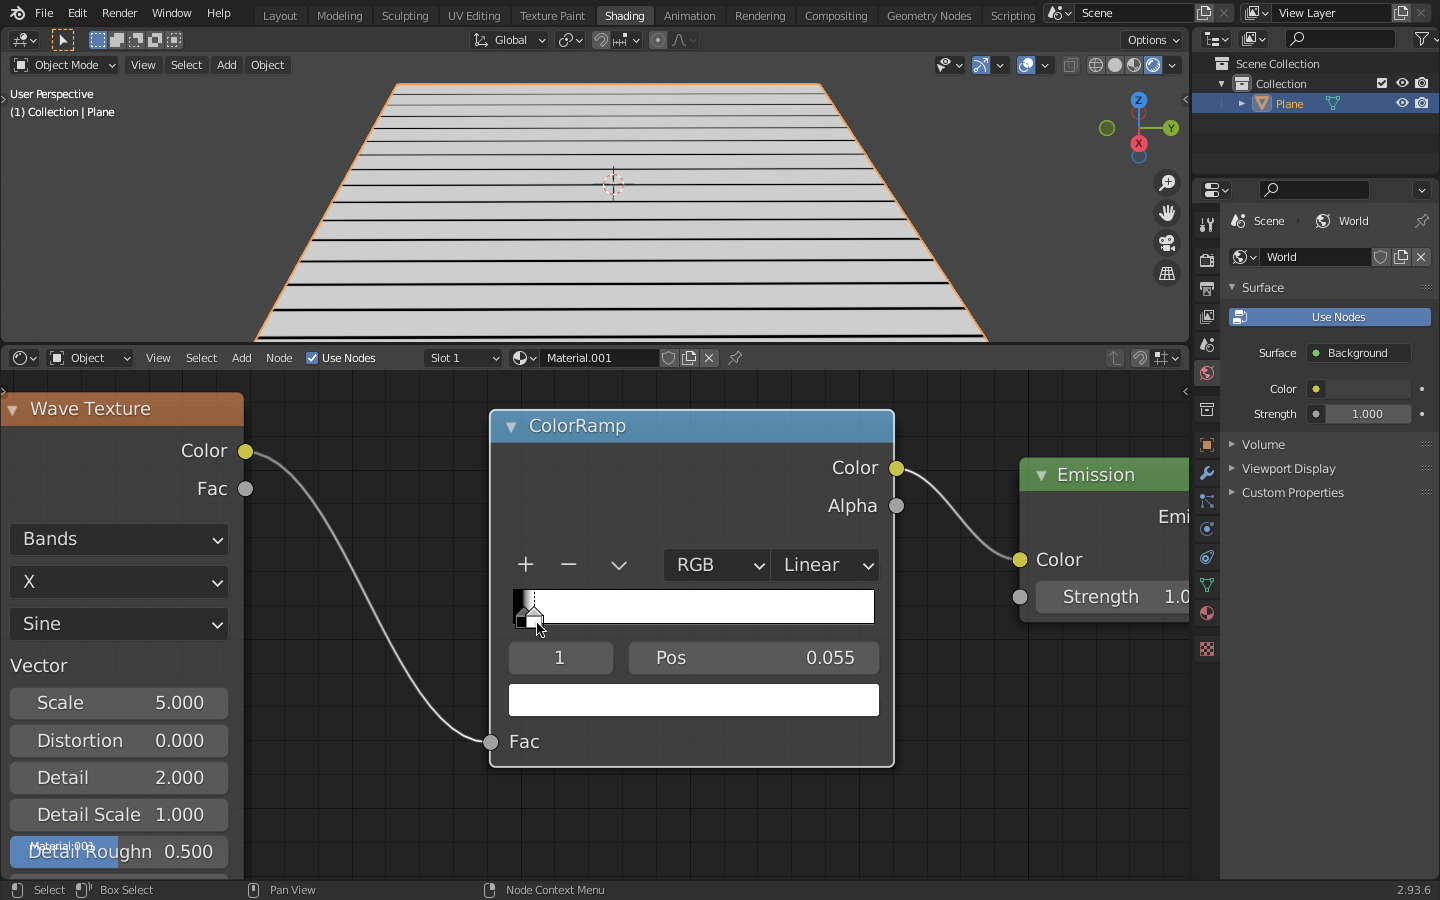
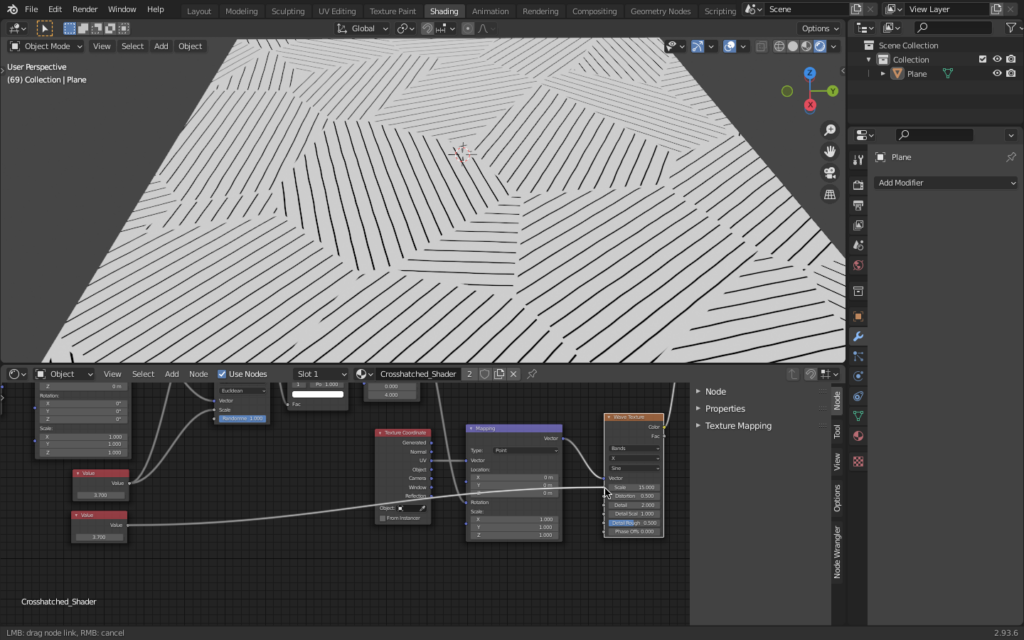
It’s unlikely that you’ll be able to draw a straight line by hand, we want our shader to reflect that if we want it to look more like an actual drawing.
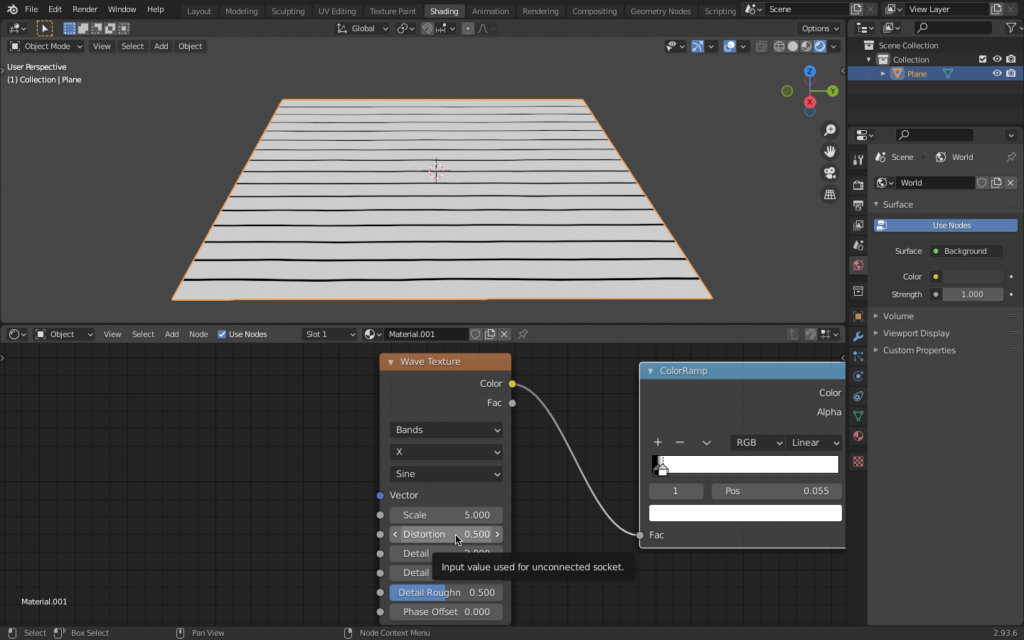
Adjust the distortion value on the Wave Texture Node like so.
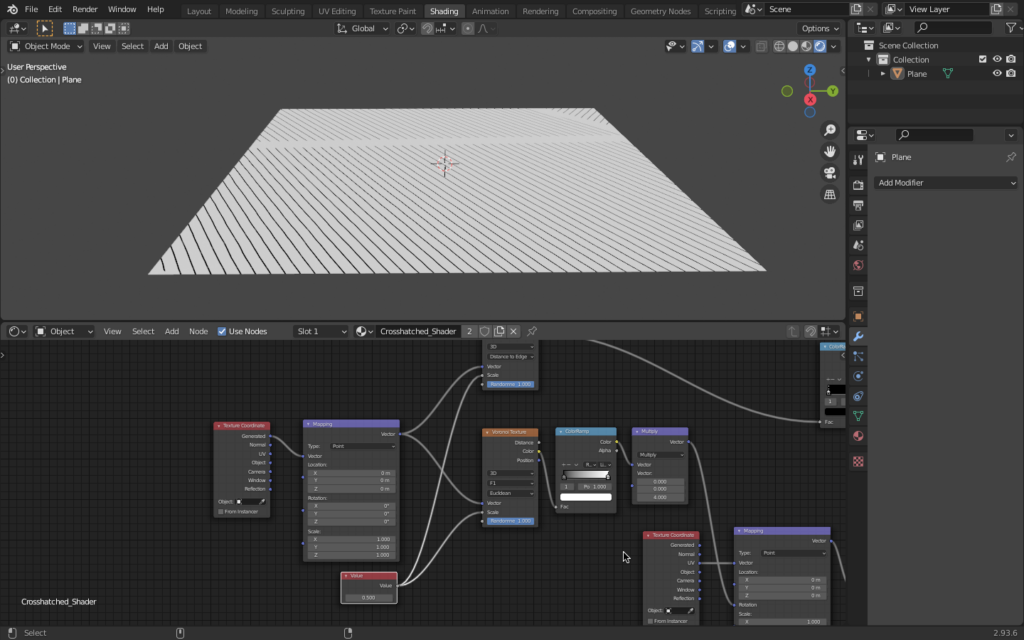
Step 2. Cross Hatching
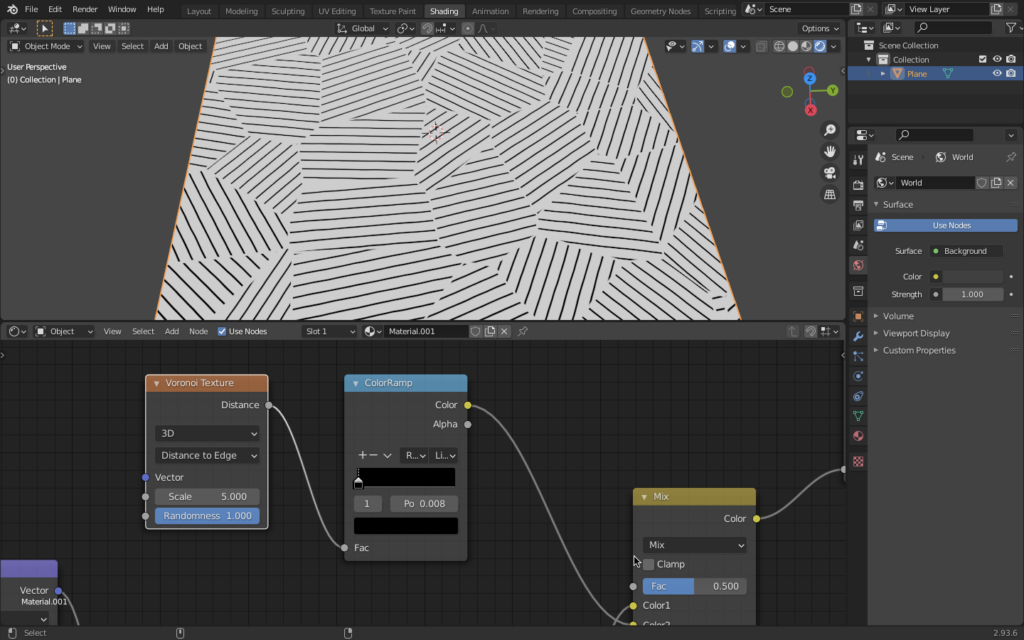
Create two voronoi nodes, with one set to “Distance to Edge”, leave this one unused for now.
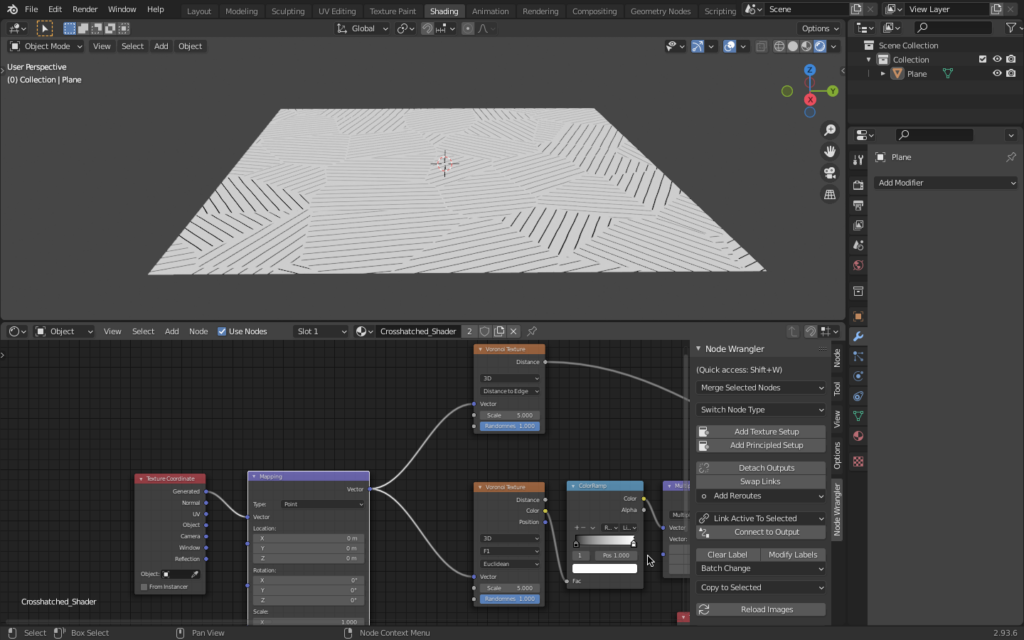
Create a vector math node and change “add” to “multiply”.
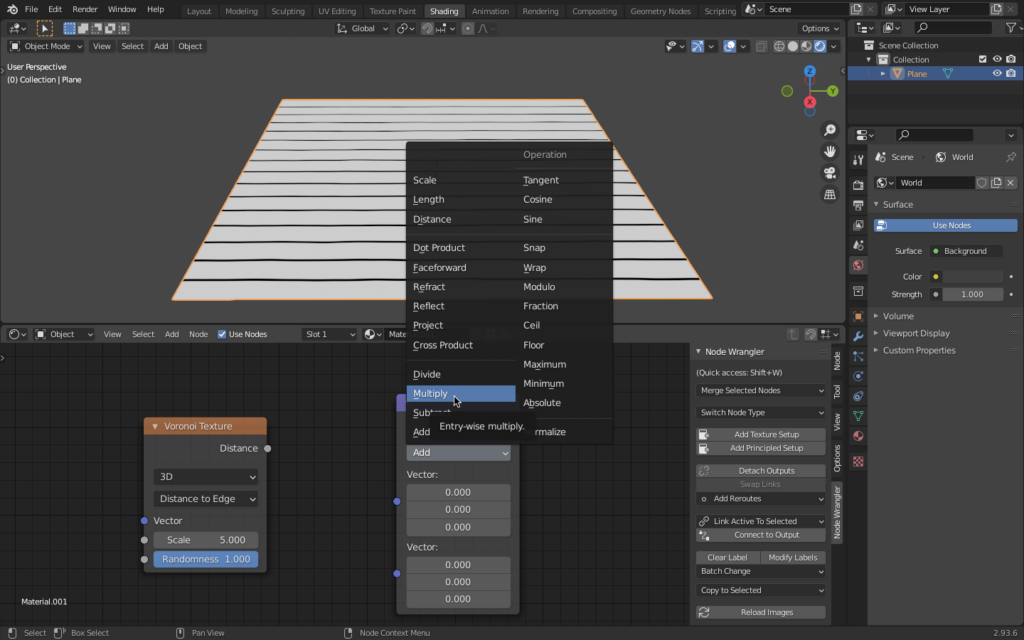
Create a Texture-Coordinate and Mapping Node, connecting the UV to the vector on the Mapping Node.
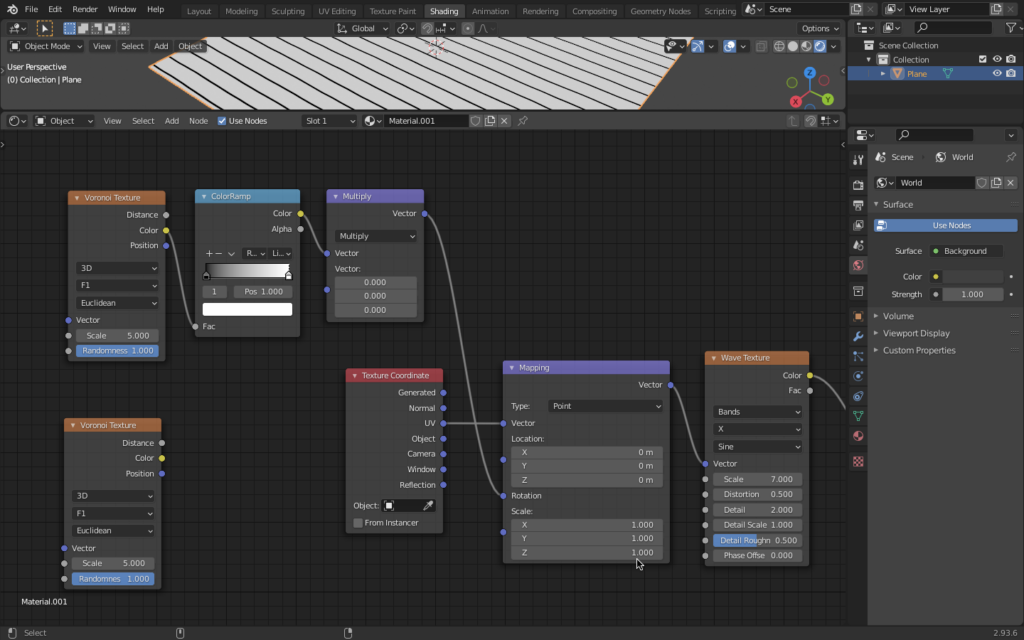
Connect our Multiply Node to the Rotation value on the Mapping Node like the image above.
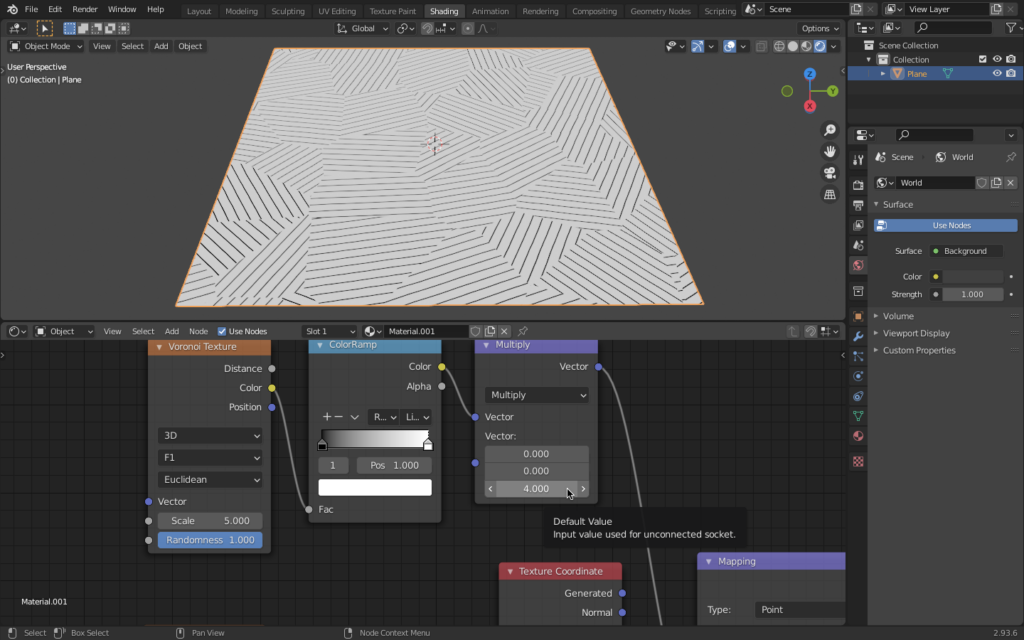
Changing the value on the Multiply will give you Cross-Hatches!
Step 3. More Nodes!
Let’s take our unused Voronoi node, add a Color Ramp and RGB Mix node and move some things around.
Connect the Voronoi node to “Color 2” on our RGB Mix Shader and change it to Screen.
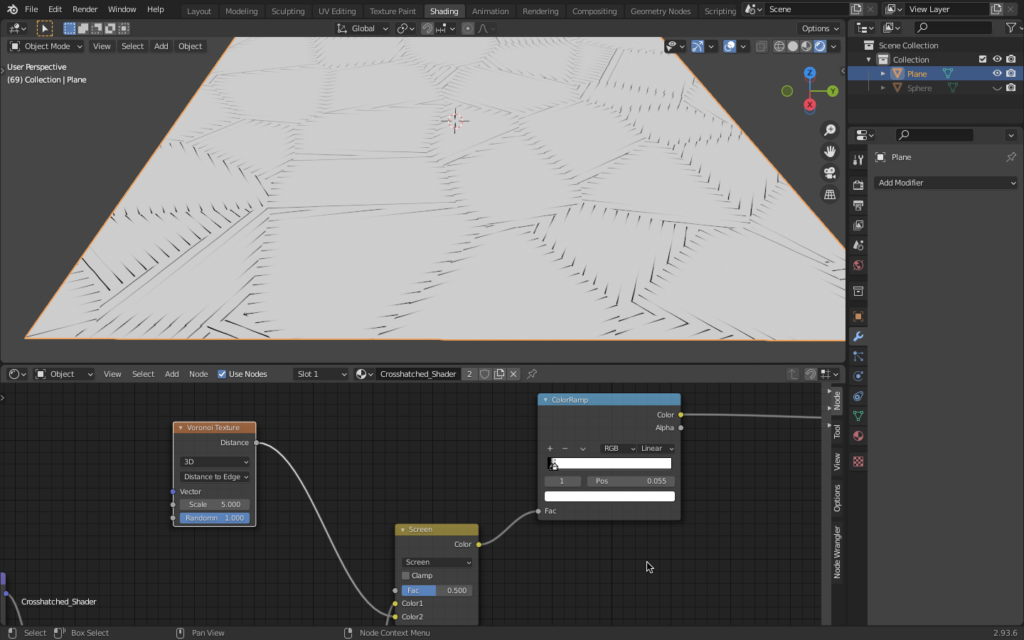
Add another Color Ramp between these nodes and adjust the slider.
Step 4. Values
Create a Tex-Coordinate and Mapping Node for our Voronoi Textures, connecting the vector on the mapping node to the vectors on the voronois.
Create a value node and connect it to the scale values on each Voronoi node.
Duplicate that value node and connect it to the scale value on the Wave Texture node.
Adjust the value in each value node to your liking.
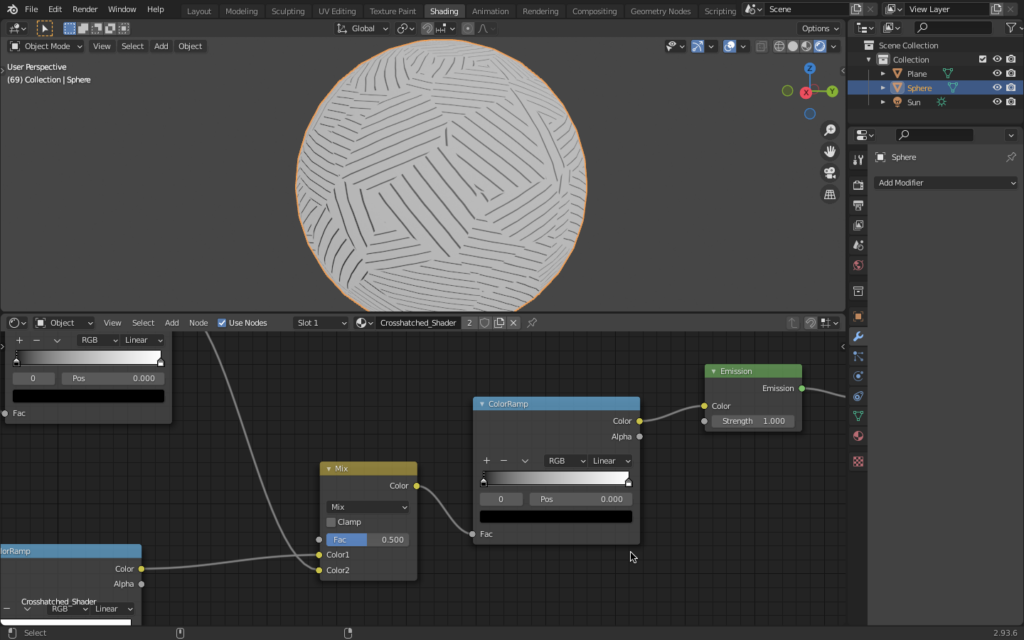
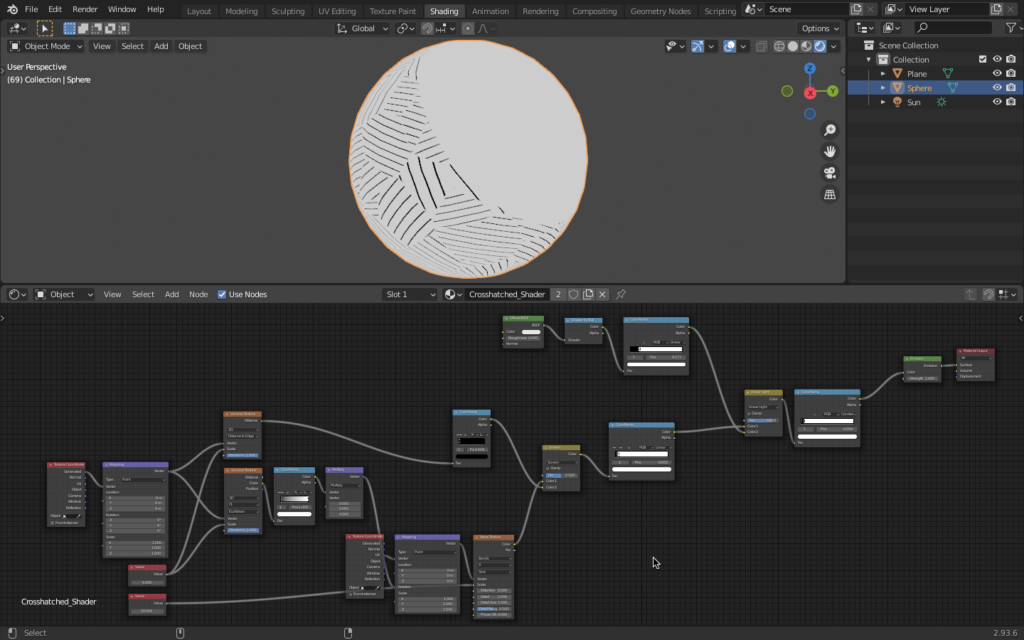
Step 5. Lighting
A UV Sphere will be best in showing light and shadow, so go ahead and create that and assign the shader to it.
Create the diffuse BSDF, Shader to RGB, and Color Ramp nodes and connect them.

Create and connect another Color Ramp and RGBMix Node. Place them just before the emission node and connect each of them respectively.
Change the second color ramp to constant.
Change RGB Mix nodes Blend mode to Linear Light and connect each color ramp to it, adjust the ramps to your liking.
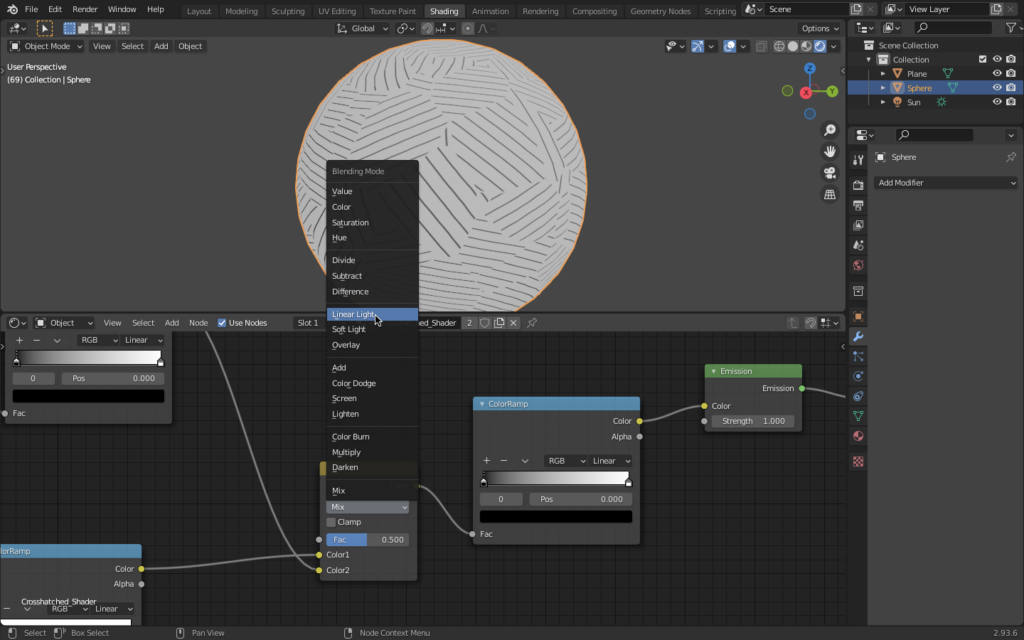
Now you’ve successfully created your cross-hatching shader! Go ahead and experiment with your own shaders!
Be sure to book a reservation for our Digital Media Labs to get the most out of your digital projects! Happy Making!
