

by Sydney Brink
You’ve heard of cyanotypes before, but have you ever heard of an anthotype? An anthotype is creating an image with light-sensitive materials derived from plants. There are lots of home-grown recipes using materials like boiled onion skins, red cabbage, or even tea to develop photos or images. Today I’m using this Instructable on how to do it with turmeric! Follow along to learn all about anthotypes.
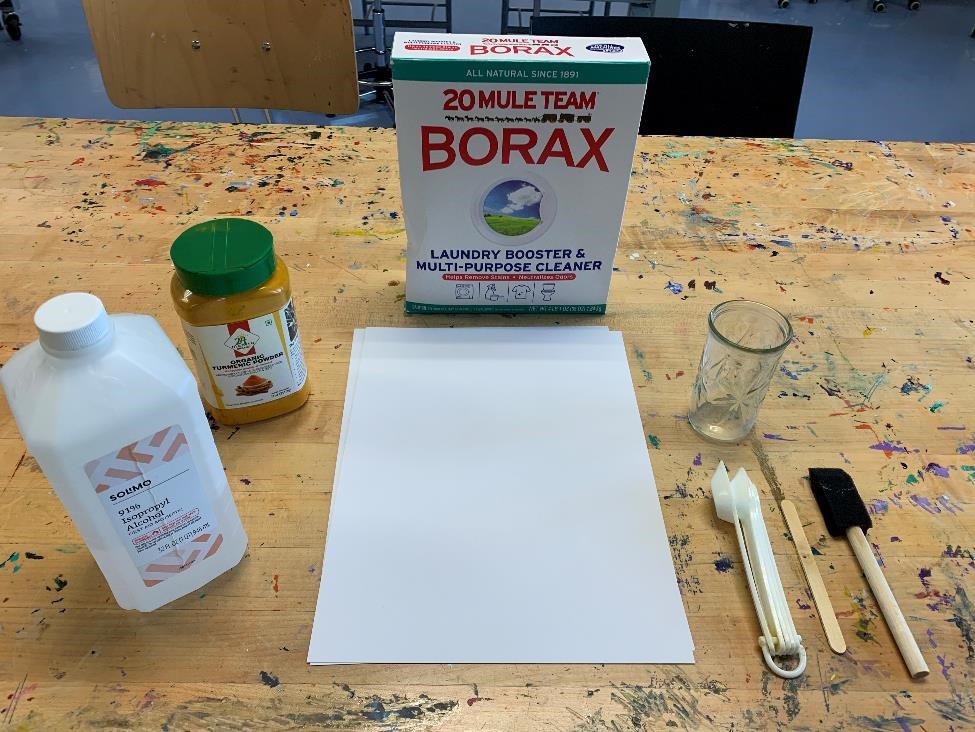
Anthotype Materials
Here is what you’ll need to get started:
- 1 tsp of turmeric
- 4 tsp of rubbing alcohol
- 2 tsp of borax or baking soda
- ½ cup of hot water
- Watercolor paper
- And I also needed:
- A glass jar or cup
- A spray bottle
- A sponge brush
- Negative image (plants, leaves, flowers, or a transparency with a photo on it)
- A piece of glass or an empty picture frame
- Measuring spoons
- A sunny windowsill!
All About Anthotypes
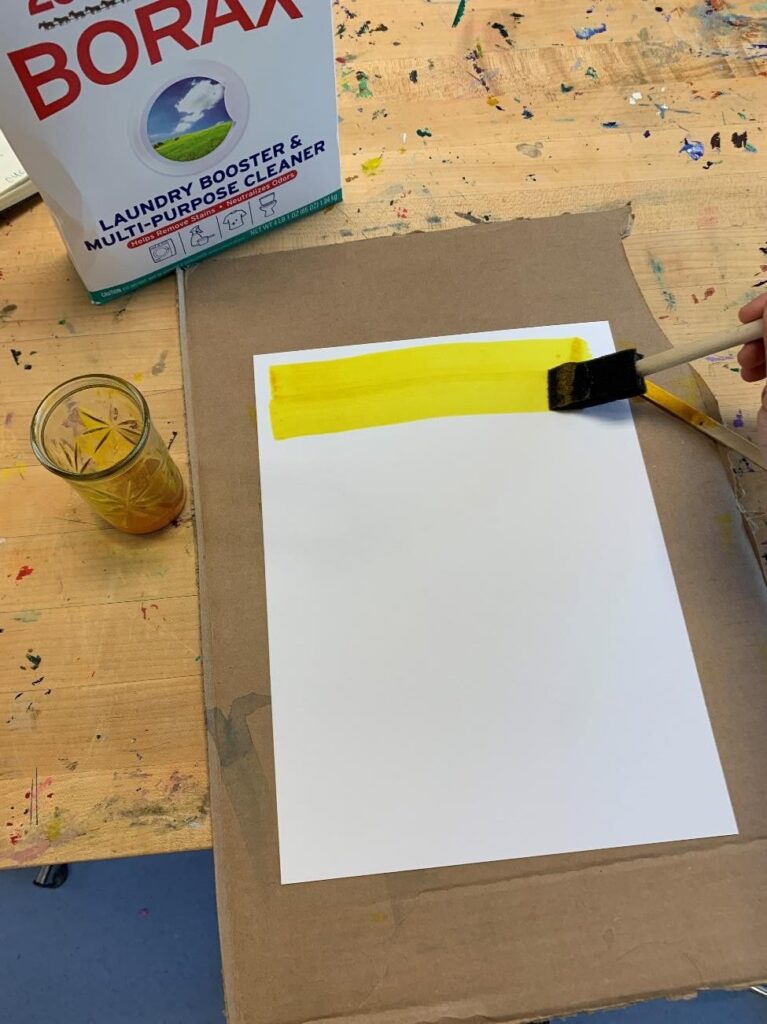
Mix the turmeric and the rubbing alcohol together in a glass jar (be careful! Turmeric WILL stain surfaces, hands and clothes!). After they are mixed, wait for a few minutes until all the solids settle to the bottom of the jar and there’s distinct separation between the powder and the liquid.

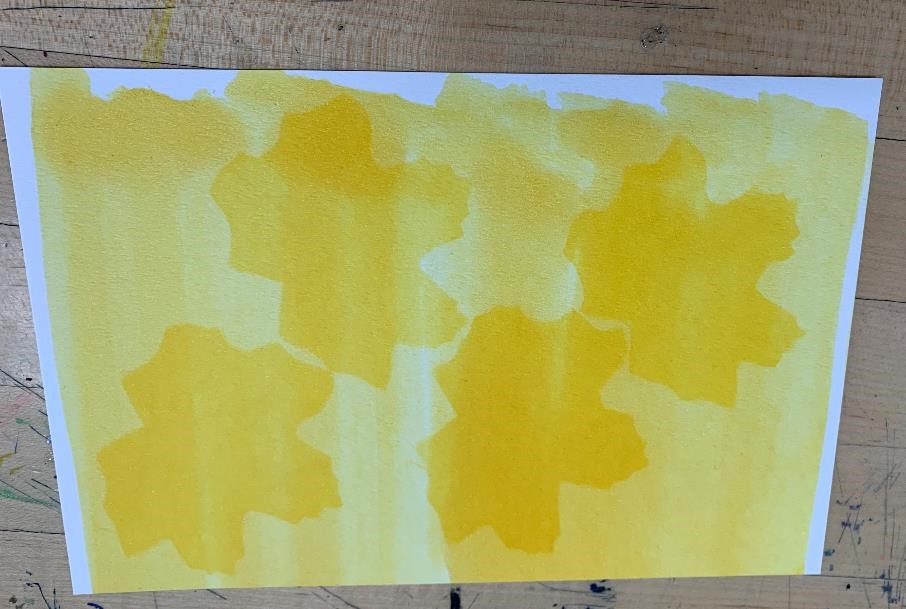
Use the sponge brush to coat the paper evenly with the turmeric liquid.
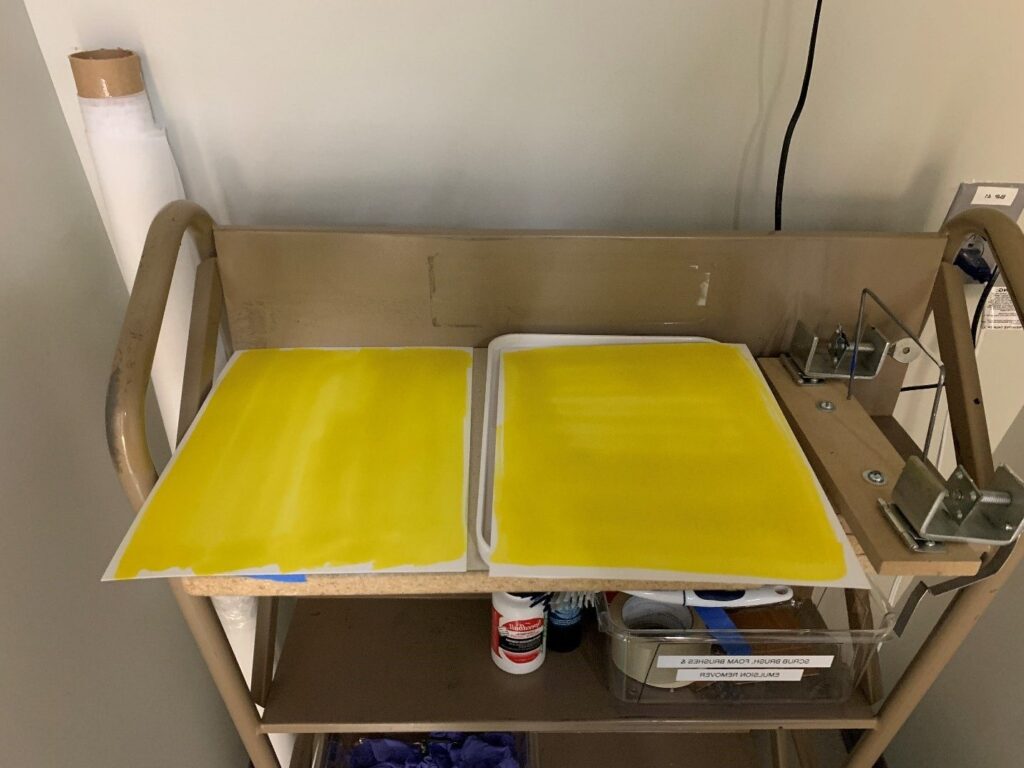
Dry the paper in a dark place. Ignite has a room outfitted like a darkroom, so I stuck them in there for the morning until the afternoon sunlight started to come in through the south-west facing windows at Ignite. If you’re doing this when you’re already ready to making the print, they will need around 15 minutes to dry.
Put your negative image (leaves, flowers, or black-and-white transparencies) on top of the dried turmeric paper. I learned from making cyanotypes that having a spare picture frame lying around is very handy – put the paper and the negative together in between the hardboard backing and the glass, then use binder clips to keep the sandwich together. This ensures everything is flat and flush with the paper to develop crisper lines. It also prevents anything from moving out of place during the exposure process.
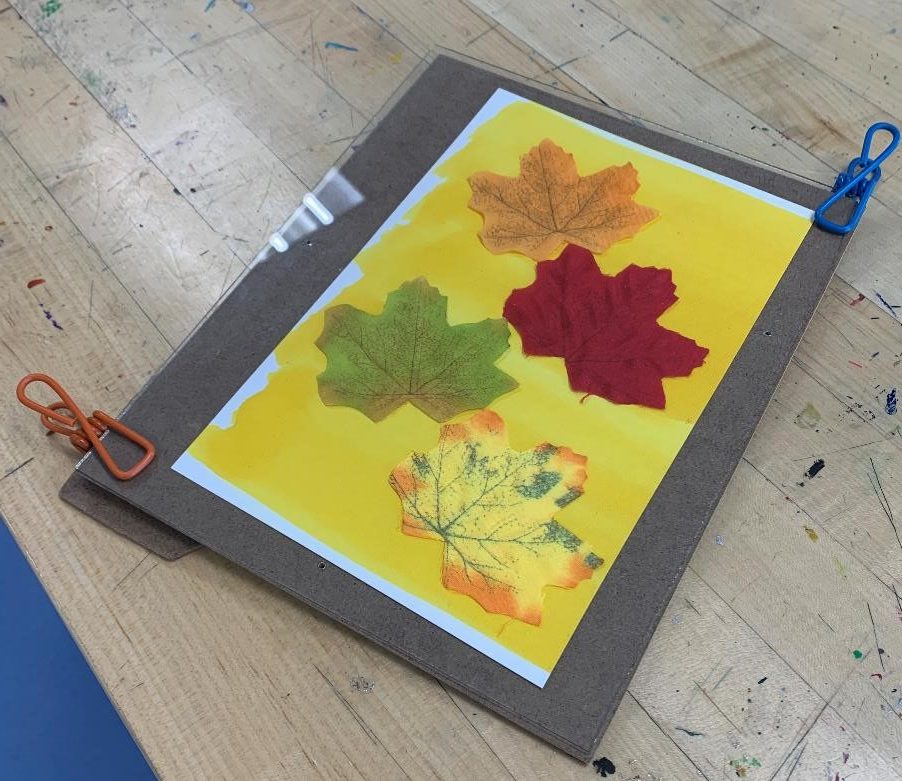
Leave it glass-up in a bright, sunny place for 1-3 hours. Once the paper is a faded yellow, you’ll be ready to develop them.
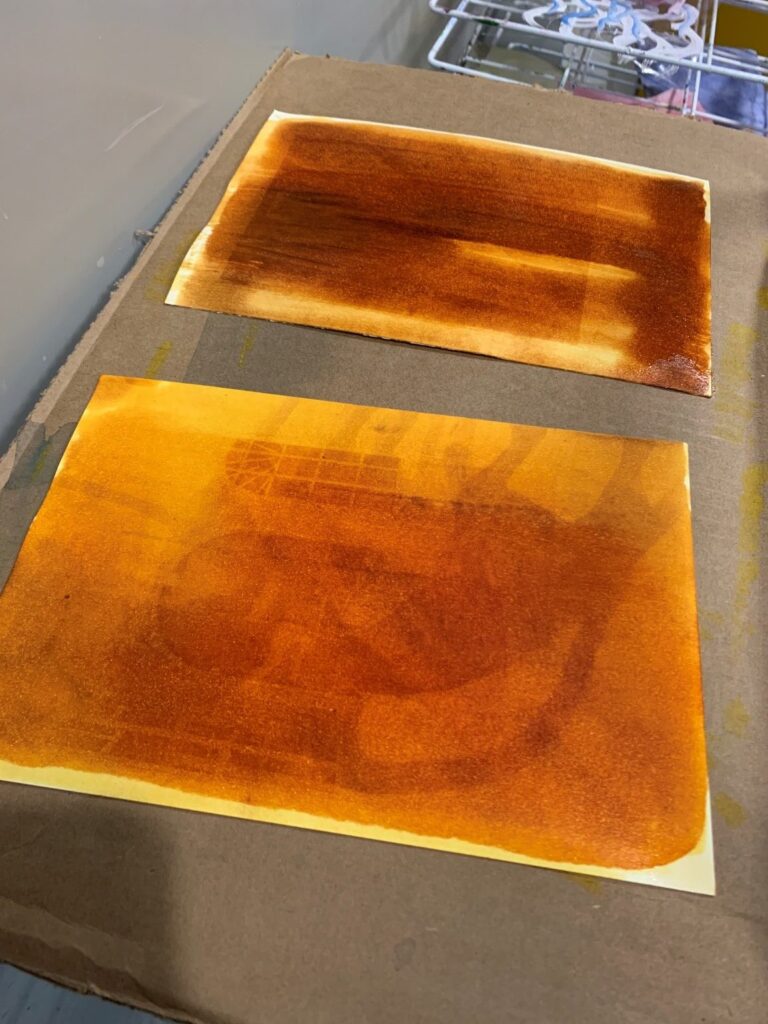
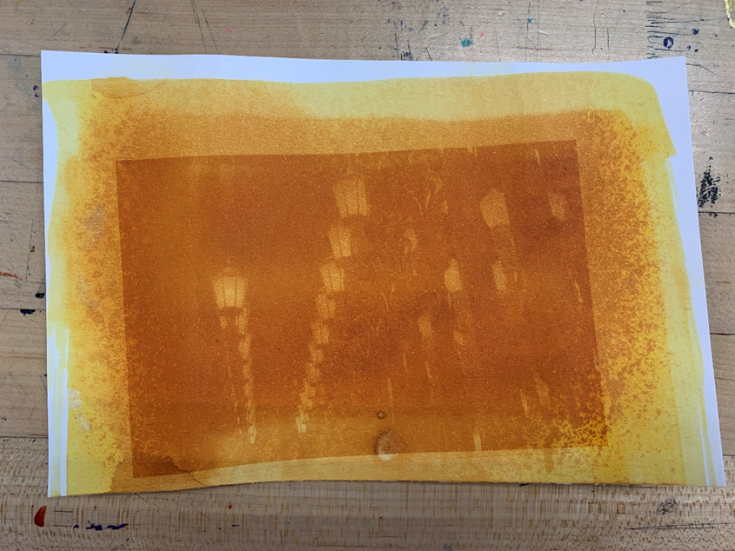
To develop the turmeric, mix 2 teaspoons of borax or baking soda with the ½ cup of warm water. Using a spray bottle, spray the mixture lightly over the print to turn the unexposed areas a dark orangey brown. This post describes the science behind why the sun-exposed turmeric develops into this color.
These will not be very lightfast – they will still continue to fade over time, so be careful about where you place your prints when they’re finished. Hanging in a frame directly in the sun will make your print lose its color faster.
The developing process using the borax is the make-or-break of the print. It seems to me that it takes a deliberate hand to apply the solution so that you still get those bright yellow tones while the dark areas develop into the brown colors. I tried both the first instruction’s “drizzling” technique by first actually dripping the borax solution onto the paper, and then by using a pipette. Either of these only got splotchy and drippy results that never really evened out. I then tried making a developing bath instead, and totally soaked the paper in the borax solution all at once to try to get a more even result. It did become more even, but it also almost completely canceled out all of the different tones in the image and basically made one big, brown square.
Oops.
The one that worked the best for me was putting the solution in a spray bottle and lightly misting only the areas I wanted to develop. It was an imperfect result still, especially looking at the splattering from the mist, but it made a better end product than either of the other methods.
However you choose to experiment with natural photo processes, have fun and happy making!
